Showing posts with label Christmas. Show all posts

Friday, 30 September 2022

The best Christmas cake recipe for beginners

This Christmas cake recipe is so good, that I was asked which posh London shop I had bought it from – which was nice because it was only the second Christmas cake I’ve ever made! The recipe is from BBC Good Food:  it’s so easy, I would recommend it for beginners. And if you are new to making Christmas cakes there might be one thing you don’t realise – yes it’s still a couple of months until Christmas, but you should make it now!

Christmas cakes are traditionally soaked in booze and you ‘feed’ the cake regularly over an extended period – so making it in October, or even earlier, is ideal. Of course, you don’t have to use alcohol and a good alternative is tea – I am also tempted this year to experiment with a flavoured tea of some kind, so that my four year old can have some of the cake. Though I am also tempted to make this recipe the same way that I did last year and just keep it out of her way, because it was amazing!
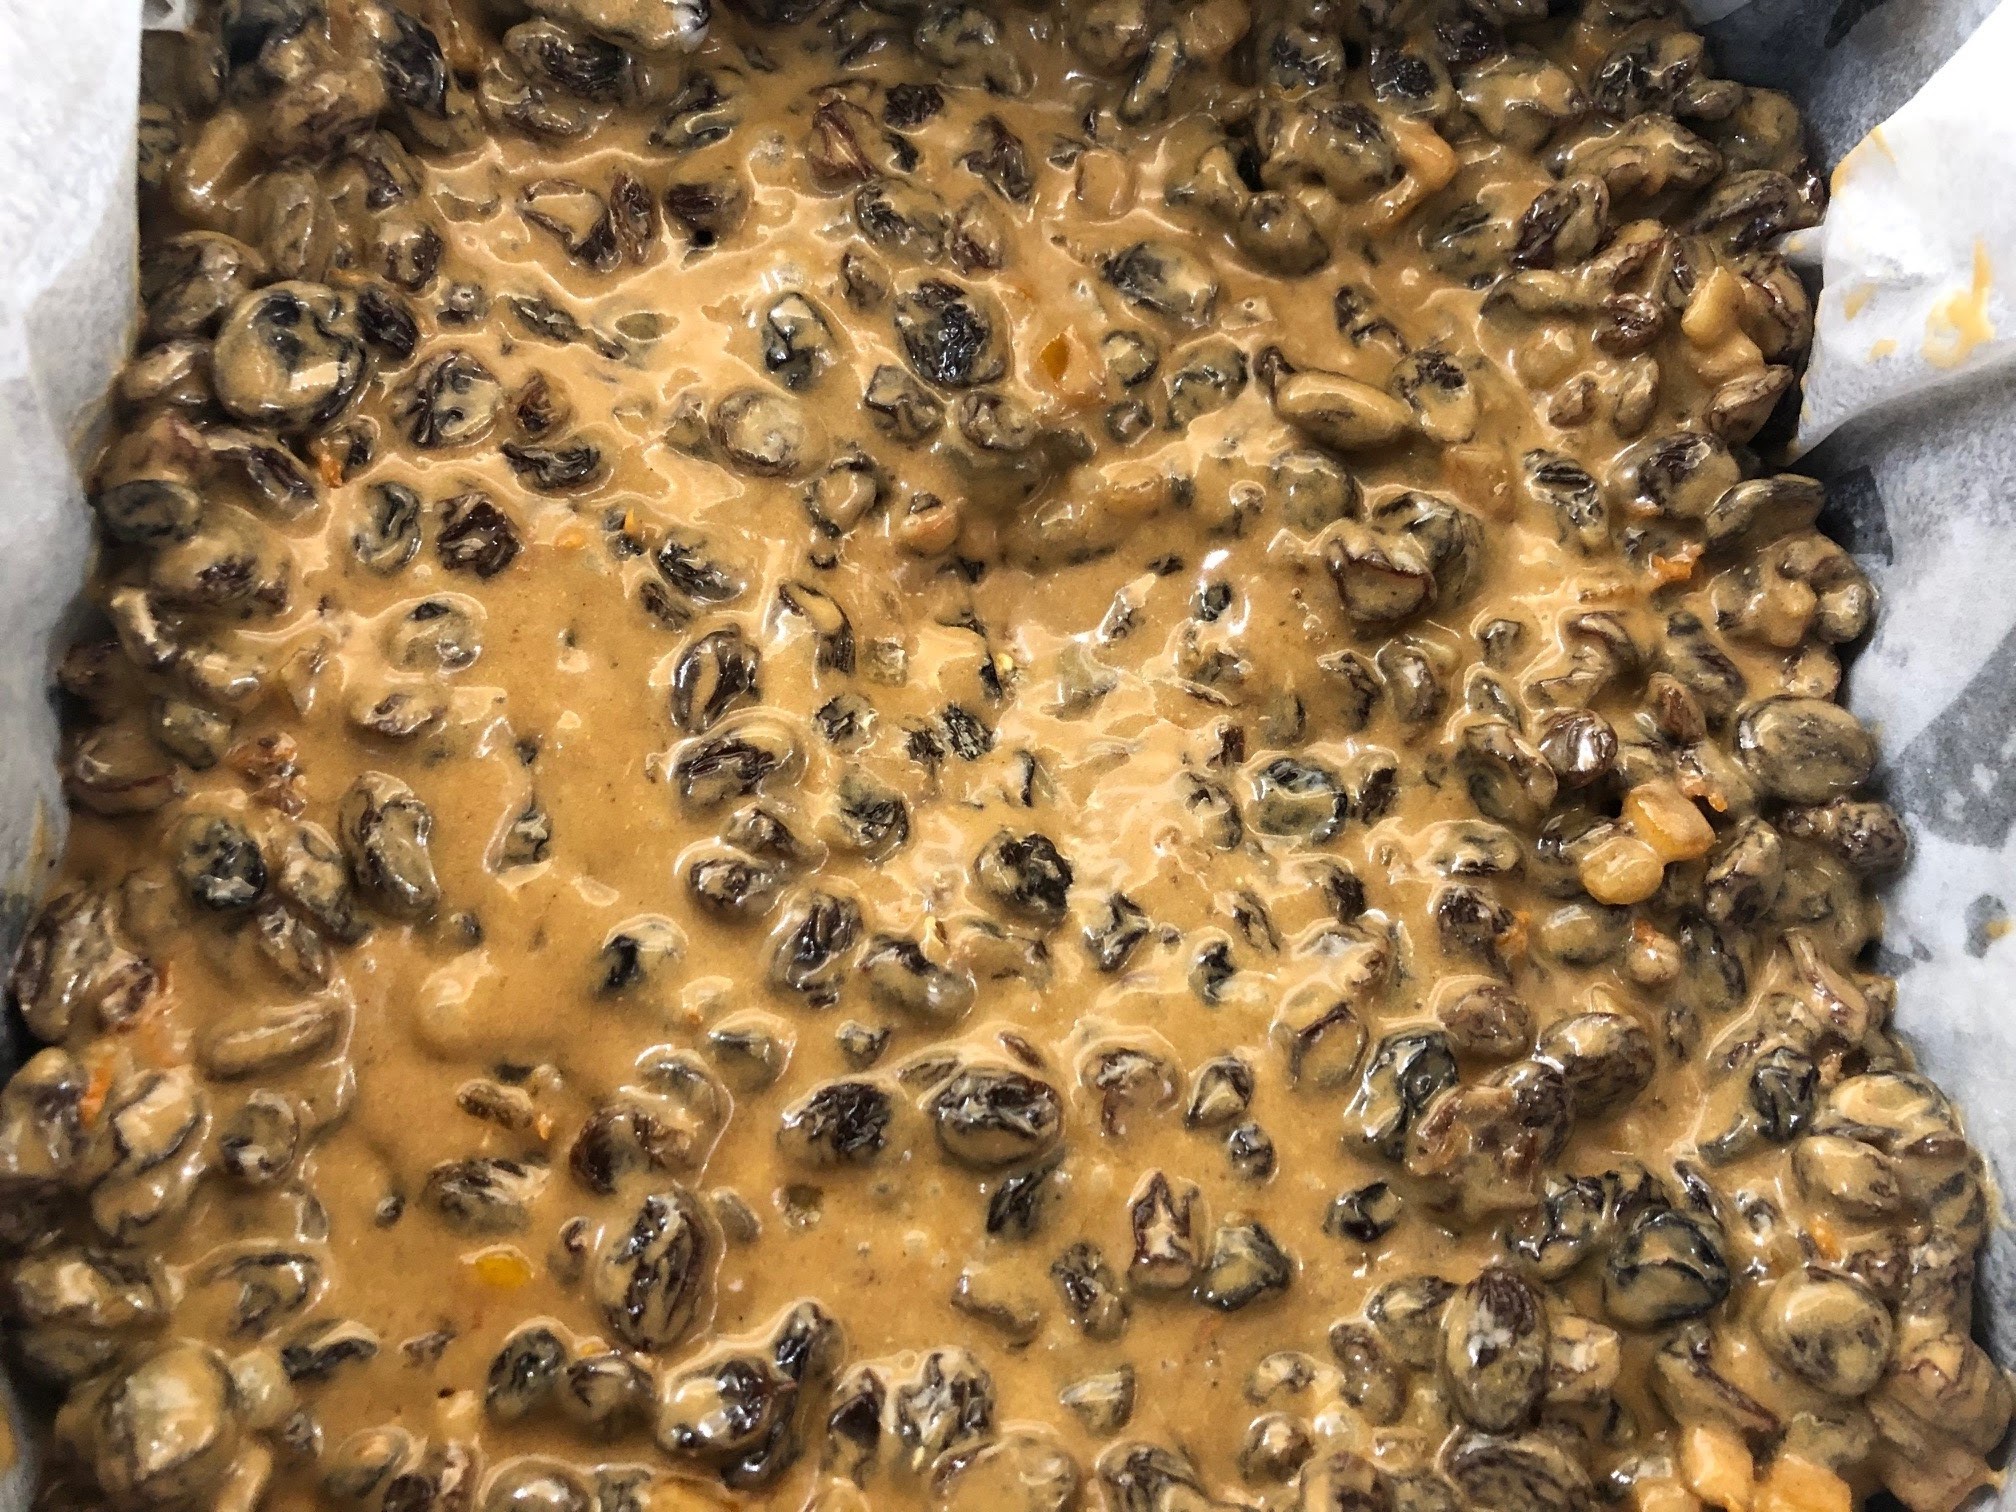
Instead of sherry, brandy or rum, I used amaretto – because I already had a bottle bought on a whim, and it’s not something I really drink. It gave the cake a lovely flavour – even though I made it quite late in the year, on 1 December (though it didn’t get eaten until January, as most of our Christmas plans in 2021 were cancelled due to our first (and only, touch wood) bout of Covid!

When it came to decorating, time was once again an issue. I had made it in a square tin so covered the cake with fondant that I then coloured gold with a packet of gold dust that came with the icing, and then cut out white fondant snowflakes using a plunger cutter to decorate the top. Everyone who tried the cake thought it was very good – myself included, and I don’t really like Christmas cake – though the best comment was from my sister, who said it was so good she assumed I had bought it, from an expensive London shop. So I think from now on this might have to be my go-to Christmas cake recipe, even if I switch up what I feed it with and how I decorate it!


Wednesday, 22 December 2021

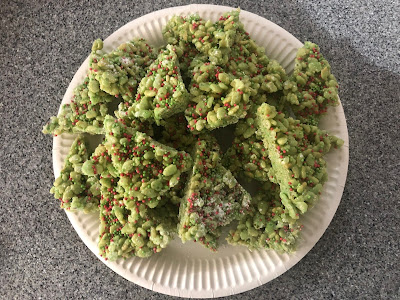
Christmas Tree Rice Krispie Treats


These little treats are easy and fun to make and are great for a children’s Christmas party or to make at home with your kids. They don’t involve any baking, and just one pan which children can do under supervision. The idea came from FoodFanatic.com but I adapted it a little.

Melt 100g butter in a large pan over a low heat along with 200g marshmallows, stirring until smooth.

Add a few drops of green food colouring and stir. Remove from the heat and allow to cool.

Mix in a large bowlful of Rice Krispies and stir gently until all the cereal is coated. 

Line a large flat baking tray with greaseproof paper and spoon on the Rice Krispie mixture. Press down and spread so you have a thin layer about 2cm thick.

Sprinkle over some Christmas sprinkles then place in the fridge to set for an hour.

When set using a knife carefully divide into triangles to make Christmas tree shapes.

I found that while the top of the Rice Krispie treats had set, the bottom was still very sticky once I had peeled them off the greaseproof paper, so I sprinkled that side with icing sugar which made them much easier to handle.

The original recipe suggested inserting a pretzel as the tree trunk but I found the treats were still too soft and started to break up as I did so, so I decided to just leave them as they were. 

My daughter was a little dubious at first as they were green but soon decided they tasted good!

Sunday, 13 December 2020

Christmas bauble cakes

There was a time when I always wanted the latest novelty cake pan or innovative piece of baking equipment from Lakeland - to be fair I still do want those things but am realistic to know I don’t have space for much more and don’t have time for the sort of elaborate bakes I used to do! But it’s fun to dig out equipment I haven’t used in a long time - or in this case had never actually used.

This is a silicon mini cake pan in the shape of Christmas baubles - I think I bought it in the January sale one year and had never actually used it!


The only instructions on the back said to use a two egg cake mix so I used this recipe from the BBC Good Food website  but had far too much cake mixture so made these reindeercupcakes as well.

I had to guess how long to cook them for as though the cakes are small they are fairly deep so I did them at 180C for 20 minutes.

You can see the design on the cakes when they came out of the pan - some baubles have stars, others stripes and two had a snowflake pattern that looks really pretty if you go over it with white icing with a fine piping nozzle.

I went over the other designs with icing with varying degrees of success. My piping has never been neat! These look quite effective when all piled together on a plate though I don’t think I’d have the patience to ice more than six, it would be a fun activity to do with children.


Reindeer cupcakes with pretzel antlers


I really wanted to make some time to do some Christmas baking when I had a day off last week as in the past I would have made several festive treats by now and I hadn’t done anything yet! 

These reindeer cupcakes are really easy, the key ingredient is the pretzels - and you can make the cakes themselves any flavour you like!

I made chocolate cakes using this recipe on the BBC Good Food site and made a simple chocolate buttercream.

When the cakes were baked and cooled I topped with a spoonful of buttercream and used salted caramel flavour chocolate coated pretzels (made by Flipz, available in most supermarkets) for the reindeer’s antlers. You can use regular pretzels as well but I thought these went better with the cake!

For the face you can use a Smartie or M&M for the nose but I didn’t have any and these were a spur of the moment bake so I used some icing I had coloured red and used a little piping bag to pipe on the rest of the face. Some of the reindeer have slightly odd expressions but my daughter liked them and so did my husband!

Saturday, 21 December 2019

Personalised Christmas Cards with Paperless Post

This is a sponsored post
  
Every year we seem to get fewer and fewer Christmas cards - actual Christmas cards, that is. With an increasing focus on climate change and the environment, it just doesn’t seem right any more to be sending out dozens and dozens of cards - not to mention the cost of the stamps.
That’s not to say I am against the idea of sending cards at all, for one thing I love to make greetings cards so of course I like to send them! But with a very active toddler I hardly have any time any more and the idea of sitting down to write a pile of Christmas cards seemed a bit overwhelming.
Instead, I sent cards to family and a few others but for the most part, decided to send e-cards this year. I’ve used Paperless Post before so went straight back there this time to make our Christmas card.
We had a Christmas themed photo shoot for my daughter in November - we’d done the same the year before when I was on maternity leave via a ‘bumps and babies’ group and as it was really good value, we did the same again this year.

The photos aren’t particularly Christmassy - my daughter is wearing a pretty red velvet dress but there were no props or Christmas images in the photo. Even so, I thought it would be nice for a Christmas card.
Paperless Post has sections for all sorts of greeting cards ranging from birthday cards to event invitations and also business flyers. I went to the Christmas section and looked at cards where you could add your own photos - there were well over 200 designs.
I chose one that I liked and uploaded the photo just by a couple of clicks, then added wording, selected whether I wanted a coloured background and the envelope. It’s really easy to add multiple recipients’ email addresses, and if you have used Paperless Post before, it remembers addresses, so you just have to start typing in the person’s name. That made it so quick to set up a list and to send the card out.
As I ended up doing it quite late at night - as is often the case when you have a toddler - I was also able to schedule the card to be sent at a suitable time, which was a function I liked.
The site uses ‘coins’ to pay for the cards, which you buy in blocks, with the price per unit decreasing the more coins you buy at once. You can get a card for just a couple of coins which as far as I can tell works out at less than sending a card in the post given the price of stamps these days.
My family and friends seemed to like receiving a personalised card and I think the pictures of my daughter were particularly appreciated by family even though I was giving people a print out of some of the photos anyway - and using Paperless Post made doing my Christmas cards a lot easier this year!
Thanks to Paperless Post who gave me coins to use on their site in return for this post. All opinions are my own.

Tuesday, 27 November 2018

How to make a Felt Christmas Stocking Advent Calendar


I'm really looking forward to my baby's first Christmas and thinking of all sorts of ways I can make it special. I wanted to have a handmade keepsake of some sort that would hopefully be in our family for years, and I hit upon the idea of an advent calendar - consisting of little stockings, each numbered 1 to 24, that I can fill with all sorts of things year after year.

Given that I haven't done any sewing in years and can't think of any time I've ever sewed for fun, I found this surprisingly easy to make. It was a little time consuming but only because I don't get a lot of free time as I have an eight month old baby, and would sew a couple of bits in the evening here and there, over the course of several weeks. If you have a sewing machine that would speed up the process as well.


The design is my own - I know there are plenty of advent calendars like this out there but I didn't copy any of them and just thought about how I wanted it to look:


To make them is very easy:
Cut out the stocking shapes from felt - you will need 48
Draw and cut out the numbers from 1 to 24
Sew the numbers onto what will be the front facing stockings first
Then sew on the ric rac edging onto the front facing stocking
Sew both parts of the stocking together along the edges
Attach the stockings  to some string with the pegs; you could also sew loops into the stockings instead if you want.

I'm really pleased with the way they turned out even though the stitching and numbers are slightly different on each; my husband says that just adds to the homemade effect and he thinks they will make a lovely Christmas keepsake.

My daughter will be nearly ten months old at Christmas so won't understand advent calendars and I had considered just filling it with chocolates for us this year, but I saw a set of finger puppets on a site called Once Upon a Time that are designed for a baby's advent calendar, at a very reasonable price, so I ordered them back in September. They were supposed to be with me by early November but with only a few days to go until the start of December they still haven't arrived and the site owner hasn't responded to my messages, so I'm hoping they will still come in time - she has a few days yet!

Tuesday, 26 December 2017

Mini Lebkuchen Doughnuts for Christmas

Lebkuchen is a German biscuit-cum-cake, a bit like gingerbread, that is traditionally eaten at Christmas; they are easy to find in UK supermarkets but having also lived in Germany for two separate periods between the ages of 18 and 22 (both including Christmas) I became quite keen on them.

I thought about making some Lebkuchen at Christmas but didn't get around to it; instead I decided to make some baked mini doughnuts using my Wilton doughnut pan which I was going to flavour with gingerbread spices, but then remembered I had a small packet of actual mixed spices for Lebkuchen that a German colleague had given me a little while ago that I'd never used. So the doughnuts tasted of Lebkuchen and I glazed them with chocolate as Lebkuchen often are.

I used this pan and the Wilton recipe to make Halloween doughnuts last year though I found the batter really thick - possibly because my buttermilk had set quite thick in the fridge - so also added some milk, and switched the plain flour and baking power for self-raising flour as follows:

300g self-raising flour
175g caster sugar
175ml buttermilk
50ml milk
2 tbsp. butter, melted
1/2 x 15g sachet of Ostmann Lebkuchen gewurtz
to decorate: 100g plain chocolate

As an alternative to the ready made Lebkuchen spice mix, you could use:
1 tsp cinnamon
1/4 tsp nutmeg
1/4 tsp ginger
1/4 tsp coriander
1/4 tsp ground cardamon
1/4 tsp allspice


Preheat oven to 200C. Mix all the ingredients in a large bowl until you have a batter that is a dropping consistency.

Grease a doughnut pan - you could also try making these as cupcakes in a cupcake tin - and drop in the batter so each doughnut ring is 2/3 full. This quantity will make two batches of 10-12 doughnuts. Bake in the pre-heated oven for 10-12 minutes.


Allow to cool in the tin then turn out onto a wire rack. Melt some plain chocolate in a microwave or bain-marie and spread over one side of the doughnuts and allow to set.

I allowed myself to try a bit even though I'm supposed to be cutting out sugar - it is Christmas after all and I hoped that a few bites wouldn't hurt - and they were delicious, tasting a lot like lebkuchen!

Sunday, 24 December 2017

Chocolate Orange Christmas Bundt Cake


This cake is delicious and a special treat at any time of year but especially at Christmas where chocolate oranges are often a popular gift (though I also asked for a Terry's chocolate orange at Easter some years!).

I had decided to make it before finding out I had gestational diabetes and still wanted to bake the cake, as I was planning to take it to my brother in law's on Boxing Day for everyone to eat anyway - it's not like I was going to eat the whole cake myself. Depending on my blood sugar readings and what else I've had I may be able to have a very small piece of it anyway - the diabetes midwife did say it wasn't a case of not being able to ever have anything sweet, but it has to be a small amount on rare occasions.

Terry's chocolate oranges are, as I said, pretty iconic at Christmas. A month or so ago Tesco had a really good offer of 3 for the price of 1 (no that's not a typo) so I think I paid £3 for three. I decided at the time to give my husband one for Christmas and use the other two for baking.

I thought the chocolate orange slices would look great across the top of a bundt and that the cake itself should be chocolate orange flavour. I'd like to be able to say I developed my own recipe but these days I'm so busy preparing for the baby as well as doing everything else, and I am very tired all the time - I actually baked three different things today and had a nap in between as well! So I used a recipe I found online at Marsha's Baking Addiction.


It was easy to make and delicious (according to my husband who ate the offcuts when I levelled the cake) - really moist and you can taste the orange with the chocolate. I definitely recommend this recipe!


The cake came out of my Nordicware bundt tin easily after I sprayed it with PME Release A Cake Spray 600 ml - sometimes I've had problems with cakes sticking in my metal bundt tins but I really wanted to use it because the ridges around the cake are beautiful and I thought would be perfect for this particular cake.

To decorate the cake once it had cooled, I melted a whole Terry's chocolate orange (broken into segments) and stirred in about 50 ml double cream.


I planned to pour this over the top of the cake but it was still a bit thick so I spooned and spread it into the ridges, and topped each one with another piece of chocolate orange (using half of another one so you need one and a half in total). As a final touch I added some Dr. Oetker gold pearls.

 
I'm pleased with the way it turned out and my husband loved how it tasted so I hope the family enjoy it on Boxing Day!


I'm sharing this with We Should Cocoa hosted by Tin and Thyme and Cook Blog Share, hosted by Recipes Made Easy.

Sunday, 17 December 2017

3D Christmas Cookie Tree


I feel like Christmas has almost passed me by this year. Normally I do all my shopping in November if not before, and do plenty of Christmas baking. This year being pregnant has meant I'm tired a lot of the time, spending half my weekends having naps, and when I am awake I have far more important things to do like register for nurseries which have a one-year waiting list!

My beloved cat was also unwell over the past week but is much better now, and I feel a bit more awake at the moment (I hope that lasts!) so decided it was about time I did something festive. Yesterday I listened to Christmas music while wrapping gifts and actually did some baking.


I bought the Lakeland 3D Christmas cookie cutter set in their January sale last year and hadn't used it yet so this was the perfect time. You get a set of star shaped plastic cookie cutters in varying sizes and two piping bags and nozzles.


There's a recipe on the back of the box which I followed though I also added some cinnamon for a more Christmassy taste. You need to make two cookies from each cutter, though I found the recipe recommended baking the cookies for 12 minutes, which I think works for the larger ones but once you get to the very small cookies, 12 minutes is too long. I baked them in batches and reduced the oven time as the cookies got smaller.


I left them all to cool, then mixed up some icing sugar with water to make a thick paste that I could pipe. I found the nozzle provided in the kit a bit thin so just snipped off the end of the piping bag and piped an outline around the edge of each cookie star. I then added some Dr Oetker gold pearls to the tip of each star while the icing was still soft.


Next I made up some thinner icing and used it to flood the inside of the cookies, and left them all to set.

The final step is to layer the cookies starting with the largest on the bottom; as you have two of each size, rotate one so that the points on the star are sticking out between the points of the cookie underneath.

I placed the final small star standing up on the top of the 'tree' though you could also add another decoration on top if you like.


The effect is really pretty and it is a little time consuming to bake this many cookies when you can't get them all in the oven at once but otherwise it's a very easy kit to use and something you could do with children. The cookies tasted really nice too - we tucked into them after helping my mother-in-law decorate her tree.

I'm sharing this with Cook Blog Share, hosted this week by Hijacked by Twins.

Friday, 8 December 2017

Forever Friends Decoupage Christmas Cards

A year or even two years ago I bought a set of Forever Friends decoupage Christmas pictures in Wilkinson’s – I remember it well as I only ever go into that shop about once a year as it’s not in a place I visit very often. I hadn’t opened the packs and came across them the other day when I was supposed to be tidying my craft supplies. I thought the cards would be so quick to make that I could justify pausing my tidy-up to make a couple!

 
Each sheet in the set came with three or four layers, starting with a background rectangle, then sections where you build up the bear. I used adhesive pads to make each layer stand out, and used a sentiment from another pack on the bottom of the card. The Christmas print background papers, which I covered each card with initially, were also from the same Forever Friends set I think.
 
It’s nice to be more creative and not just follow the designs prescribed but on the other hand these look quite professional – I didn’t even have to cut out the decoupage layers myself, they popped straight out of the pack!


I'm sharing these with the That's Crafty! Challenge and Papers Creators Crafts Christmas themed challeges.

Sunday, 3 December 2017

Tattered Lace Ornate Reindeer Christmas Cards

When I got my Sizzix Big Shot cutter two Christmases ago, I also received a beautiful tattered lace die called 'ornate reindeer'. I cut out several reindeer from sparkly cardstock almost right away, with a view to making cards for the following Christmas, but then that Christmas (last year) I made a few cards but think I forgot about these die cuts! So when I came across them earlier this year I made a few cards that I am now able to send out this year.

I've written before about using the die cutter and tattered lace dies. This one was particularly fiddly in places so my poking tool came in handy!

What I hadn't realised initially was the size of these dies - they take up most of the size of a standard 6x4 card blank, not leaving much room for other embellishments.

 
I did try out some different things though I'm not sure which of these works best and I don't feel like I'm really doing justice to the tattered lace die cuts. If you have this die and some good ideas for how to use it, please let me know!

For these first two cards I used large gold card blanks so I wouldn't need any other background. For one card I cut a gold oval with scalloped edges using another die, and mounted the reindeer on it - the reindeer is cut from sparkly red card. I added the words 'winter joy' which are from another die - I think it's actually a die of Christmas baubles with the words in the middle.

For the card on the right, I cut the reindeer from sparkly black card and mounted it using the smallest adhesive pads I could find which I even cut in half but you can still see them behind the reindeer. The ornate shapes around the edges are offcuts from die cutting - as this was so long ago I can't remember if they were the bits that came out from the spaces in between the antlers or from another die altogether. I used a 'merry Christmas' gold outline sticker to finish the card.


Here I covered the card blank on the left with two pieces of printed paper in complementary light blue colours - you can't see too well but I think they both have a snowflake design. I cut the reindeer from sparkly gold card and stuck it on the top half of the card, and a wooden gold card topper saying 'joy' - from a pack from The Works - on the bottom.

For the second card, I turned a gold card blank sideways and put two reindeers facing each other - one made from sparkly bronze card, the other from sparkly gold, with a 'merry Christmas' outline sticker in the middle and two little gold stars in the corners.


Finally I made a CAS (clean and simple) reindeer card using a green card blank and a reindeer die cut from gold card (non-sparkly this time) and a 'merry Chrismas' out line sticker.


I found the last of these in particular quite masculine so am linking up with the Cardz 4 Guyz challenge where the theme this week is reindeer.

Thursday, 9 November 2017

Tree and Santa Pattern Christmas Cards


These two cards are mainly made from a mini set that contained a few pieces of patterned paper and one sheet of die cuts. I think they are quite fun but there is also something a bit masculine about them, I think because of the colours and also the geometrical shapes.

On the first card, I covered a square card blank with the patterned paper and mounted a die cut tree with adhesive pads. It's also a little hard to see but there are a few tiny die cuts in the shape of presents and snowflakes also on adhesive pads so they stand out. To finish off, I used a 'noel' shiny red sticker from a different pack.

For the second card I covered the bottom half of the card with patterned paper and used a piece of washi tape across the edge as a border. The two child (elf?) stickers at the top were actually left over from a pack of Christmas address labels that I think came from Ikea a couple of years ago. Finally a 'tis the season' sticker in the top right corner completes the card.

I am sharing this with Crafty Hazelnuts Christmas Challenge and Cardz 4 Guyz where the theme is Christmas trees.

Sunday, 24 September 2017

Christmas Cookie Recipe Christmas Cards

I went into my craft room (aka the spare bedroom) earlier today to quickly make a 'new home' card for my brother-in-law and his family, and got rather side-tracked and ended up making a dozen Christmas cards - and not actually making the new home card at all!
I came across some free printables I'd downloaded and printed out a long time (I think literally a couple of years) ago. Each sheet had three tall thin rectangles containing a recipe for Christmas cookies - I really like baking so I thought this would be a great thing to put on Christmas cards. They would work on the front, back or even inside cards!
I had some tall thin card blanks that were just the right size so I decided to put these on the front of the cards for a slightly more unusual - and hopefully useful - Christmas card.


The recipes were the right width but shorter than the height of the card so I had a gap at the top and bottom. As the recipes had red borders, I cut out strips from a small piece of Christmas wrapping paper I'd put in my card making stash and stuck that along the top and the bottom. Finally I used small die cut greetings on either the top or the bottom of each card.

I will have to think carefully about who to send these cards to and pick people who I think might actually bake the cookies!
 
I'm sharing this with DK Kard Kreations for a 'never been used before' theme as I've had a few of these sheets in my Christmas card box for ages and never used them.
I'm also sending it to Christmas Card Challenges and Crafty Hazelnut's Christmas Challenge where the theme is 'anything goes as long as it's Christmas'.

Sunday, 2 July 2017

Silver Toned Christmas Bauble Christmas Card


One of the card making magazines I got as part of a special offer last year had a Christmas card kit attached to the front cover, that had various die-cut circles. To me, the circles looked like Christmas baubles, so I took a rectangular card blank and covered it with a piece of paper from the same kit, that had rows of what looked like Christmas decorations, and then stuck on three of the circles using adhesive pads.

I then took a sheet of silver outline stickers that I often use as borders, and chose one that had a chain link effect (some are more like a wavy line) and used that to make it look like the baubles were hanging from something.

I like the design and the colours of this card - silver with purple hints. I've stashed this away for next Christmas!

I'm sharing this with Sparkles Christmas Challenge as the theme this time is ornaments.

Friday, 2 June 2017

Bright Colours Festive Bauble Christmas Card


One of the card making magazines I subscribed to just before Christmas came with a selection of freebies to make your own Christmas cards. As well as the free gift on the front cover, there were the usual printed papers in the middle of the magazine. These are thin pages printed on both sides - which seems a bit pointless as you can usually only use one side - and related images that you can cut out.

What was unusual was the colour scheme - pinks, yellows, blues and purples, not normally colours that are associated with Christmas. I used one of the printed papers showing Christmas baubles to cover a card blank and cut around some other baubles and used adhesive pads to raise them off the card. The sentiment in the middle is also from the printed papers in the magazine, stuck onto card and mounted again with an adhesive pad. It's a bit different from the other Christmas cards you might receive!

I'm sharing this with Sparkles Christmas Challenges as this month they've asked crafters to use non-traditional colours.

Tuesday, 9 May 2017

Ice Skating Decoupage Christmas Card


Here's another Christmas card I made at the end of last year but put away in my stash for next Christmas. The pieces all came free with a card making magazine so it was a pretty quick make. First a festive scene for the backing paper, then a strip of patterned paper vertically down the middle of the card. An ice skating scene in decoupage - I think it had three layers - stands out from the top third of the card, and a sentiment ' -Merry Christmas and a happy new year' - sits in the bottom third.

I hope I remember where I put these when it comes to Christmas!