Showing posts with label Halloween. Show all posts

Thursday, 26 October 2023

Halloween Chocolate Bark

If your children have been trick or treating, or you stocked up on goodies to hand out yourself, you might find you have an excess of chocolate and sweets left over come November. While it’s perfectly acceptable to still be eating it come January, with Christmas not that far off you might be looking for ways to use up this leftover chocolate and candy. 

Chocolate bark is a good option as it’s easy to make, and fun to do with kids, plus it makes fairly banal sweets or chocolates into something a bit more interesting.

Simply melt some chocolate, spread it over a piece of baking paper in a square cake tin or rectangular baking tray, sprinkle with sweets, chocolates (M&Ms and Smarties work well), popcorn, even broken biscuit pieces, and leave to set in the fridge. When set, break into slabs (you may need to carefully stab with a knife) and enjoy.

For mine I used a baking tray and 200g white chocolate and 100g milk chocolate. I melted both types of chocolate separately in the microwaved and coloured half the white chocolate purple and the other half orange. I swirled the three colours together in the tray and sprinkled over some M&S Hallow-Scream Munch Mix, £3.50 for 300g (I used about 100g). The mix contains mini pretzel pieces, chocolate covered pretzels, green and orange crispies (like little biscuit pieces in a candy coating), popcorn pieces covered in white chocolate and milk chocolate pretzel clusters - though I didn’t use the latter in my chocolate bark as the pieces were a lot larger than the others.

This could be enjoyed as part of a Halloween party or nibbled on while watching your favourite scary movie!


The recipe can be adapted easily for other times of the year such as Christmas, or Valentine’s Day as I did here (this is my other blog if you are interested in parenting posts)! 


Wednesday, 25 October 2023

Halloween Spooky Sugar Cookies


I recently did a class with Biscuiteers which I shall write about separately - and since then I've been enjoying baking and decorating biscuits at home, now I know the 'proper' techniques for decorating! The trick is to use royal icing to pipe an outline, then when it has set, use thinner royal icing to 'flood' the inner part of the biscuit.

I have a large collection of cookie cutters and among them, a pumpkin, ghost and bat. I used a Biscuiteers recipe which you can find online here - the addition of golden syrup makes the dough less likely to spread during baking.

I tried a few different designs, including writing 'Boo' on a ghost, and a pumpkin with a face - but I prefer the look of the plain pumpkin cookies. I think the bats came out fairly well too. I made a few of each type and plan to serve these when my daughter has a couple of friends around for a mini Halloween party - if they aren't eaten already before then!

Sunday, 4 November 2018

Easy Vegan Pumpkin Pie to use your leftover pumpkin


I was determined to use up my pumpkins in cooking this year and not just throw them away so as well as this pumpkin and gnocchi gratin I made a pumpkin pie. I've made a pumpkin cheesecake (vegan) before, and this chocolate pumpkin cheesecake, but I've never made an actual pumpkin pie before.

I was spending the weekend with friends so a pie seemed like a nice thing to take; one friend is vegan so I needed to find a vegan recipe. I had a look online and ended up creating my own recipe based on this one from Yummy Mummy Kitchen, but using shop-bought shortcrust pastry, which is vegan, and using my fresh pumpkin rather than canned, coconut milk and cornflour to thicken, and brown sugar and golden syrup to sweeten it. The end result was a soft baked pie filling, almost the consistency of a baked cheesecake, which tasted delicious! It was very popular with my friends, vegan and non-vegan alike.

See below for the full recipe - I also want to mention here the vacuum seal food storage container from Ozeri that I used to transport and store my pie in. You get two large domed containers in the pack, and you simply close the valve at the top and push down to create a vaccum seal; when you want to open the container just open the valve. This keeps the food fresh and there's also a handy dial you turn to show which day you put the food in the container. They are fairly large to store but are a nice sturdy design and I like the fact that the lid is clear plastic so you can see what's inside, so this is also a nice way to serve food for instance when you are outside in the summer and want to keep the insects away!


It's currently available on the UK Amazon site but with fairly high shipping costs as it comes from the US, or you can find it on other Amazon sites which are cheaper to ship to the UK.

So here's how I made my pumpkin pie
Serves 10-12

Flesh from one large pumpkin, skin removed, chopped
500g shortcrust pastry block
The cream from the top of a 400ml tin of coconut milk plus some of the milk making up 200ml in total
150ml golden syrup
75g brown sugar
1 tsp ground cinnamon
1 tsp ground nutmeg
3 tbsp. cornflour

Stew the chopped pumpkin in a pan of boiling water until softened then drain. Allow to cool then pulse in a food processor until you have a smooth puree.


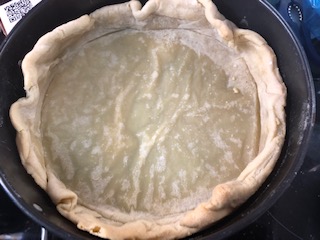
Preheat oven to 180C. Roll out the pastry and use to line either a deep tart tin or a loose bottomed cake tin. Line with greaseproof paper and fill with baking beans and blind bake in a preheated oven for 15-20 minutes until the pastry is starting to turn golden brown. Remove from the oven and allow to cook while you make the filling.


In a large bowl, mix the pumpkin puree, coconut cream and milk, golden syrup, brown sugar, cinnamon, nutmeg and cornflour and beat until smooth.

Pour into the pie crust and return to the oven for 45 minutes. If the top of the pie starts to brown too much, cover with foil.


Remove from the oven and leave to cool then chill overnight in the fridge - this should make the filling set.

I'm sharing this with Baking Crumbs hosted by Jo's Kitchen Larder and CookBlogShare hosted by EasyPeasyFoodie.
 

Thanks to Ozeri for the food storage containers to review.

Saturday, 28 October 2017

Lime and Coconut Halloween Slime Ghost Cake


Halloween baking is such fun - you can really push the boundaries of how you would normally decorate a cake, and make it as over the top as you like! Obviously subtle black and purple looks very stylish and striking but this Halloween I decided to go for..... green slime!

The theme for Food 'n' Flix this month is Ghostbusters - the 2016 remake which was chosen by host Coffee and Casseroles. I did enjoy the film and didn't think there was anything odd about an all-female cast - the film was funny, it carried on the ethos of the original Ghostbusters film and there were even several nods to the original - which I won't spoil if you haven't seen it, but you will have fun spotting the cameo roles to the extent that I'd worked out who Patty's uncle was (who she refers to a few times) long before he appears on screen!

My heart is loyal to the original Ghostbusters though (the first one anyway, not the sequel - which I don't remember being that bad but is largely panned). It came out when I was five years old so I don't imagine I would have seen it right away, but by the time it was shown on TV (in the days of only four channels, you had to wait a couple of years for new movies to appear on screen!) I would have been about seven or eight and was transfixed. I even used to run around the playground at primary school with a group of friends acting out Ghostbusters stories - though as one of the only girls I was always forced to be Janine. Though it could have been worse, the other girl played Slimer!

In terms of choosing a recipe for Food 'n' Flix, my mind turned straight away to the Stay Puffed Marshmallow man from the first movie... from the remake, one of the over-riding foodie references is to Chinese takeout - there's a standing joke about takeaway food that Abby (Melissa McCarthy) gets from a Chinese restaurant, and their HQ is above a Chinese restaurant.

But as it's Halloween I wanted to make something 'spooky' and not Chinese food. Slimer, the friendly green ghost, features in both the original movie and the remake, so I took him as my inspiration and decided to make a cake oozing with green 'slime' buttercream!


For the cake itself I used this recipe from RTE for Irish chef Rory O'Connell's toasted coconut and lime cake though I did change it a little. I didn't cover it with the toasted coconut and I didn't make the cream cheese filling and instead did a lime flavoured buttercream which I then added green food colouring to.
 
Despite being green the cake looks quite elegant like this... but I wasn't going to stop there!
 

On top of the cake there is more green buttercream, plus some green candy floss I bought in a tub from a shop called Tiger and some marshmallow ghosts and chocolate eyeballs, also from Tiger.

Does it look like Slimer has been at this cake?!


I'm sharing this with Food 'n' Flix and Cook Blog Share.


Sunday, 22 October 2017

Mini Trick or Treat No Bake Lemon Cheesecakes for Halloween Party

 
Party food for Halloween parties is pretty easy, I think - as well as all the usual suspects (sausage rolls, sandwiches or mini burgers or quiche or whatever) and then any kind of 'scary stuff'. Here's an idea that's hopefully a little bit different.

I wanted to make something a bit different for Halloween but wasn’t quite sure what. I was in Iceland picking up a few groceries and saw these on the Halloween display: a pack of six mini plastic pumpkins, which you can fill with treats (or tricks!) and use as a game, a bit like an Easter egg hunt perhaps. They were only £1 so I bought them. I had a better use for them though – use them to serve desserts!
 
 
Of course these are plastic and can’t go in the oven but my mind went straight away to no-bake mini cheesecakes. When I got home I devised the following recipe.


I made, and served, each mini cheesecake inside the pumpkins – I went with a lemon flavour with a ginger biscuit base, but you could always do pumpkin flavour cheesecake or anything you like. I wanted to make one of the six a ‘trick’ rather than ‘treat’ and thought about putting a small plastic spider inside to surprise the recipient – but didn’t think that would go down too well with my husband!
 
Instead I decided to colour one of the cheesecake toppings green with food colouring. You could easily do that to all of them for a children’s Halloween party, but I thought it would be a nice touch when I served the mini cheesecakes in the closed pumpkins, if everyone chose their own and when one person opened theirs, they got a bit of a surprise!

Here’s the recipe I came up with

Mini no bake Halloween lemon and ginger cheesecakes - an original recipe by Caroline Cowe @Caroline Makes


Makes six mini cheesecakes

You can also make these mini cheesecakes in paper cupcake cases, or ramekins, or anything you think will work!

6 McVitie’s ginger biscuits
2 level tbsp. butter or marg, melted
175g cream cheese
60ml double cream
50g caster sugar
Juice of ½ lemon (or more to taste)
Couple of drops of green food colouring if desired


Crush the biscuits either in a food processor or with the back of a wooden spoon. Melt the butter either in a small pan over a low heat or in the microwave and stir in the crushed biscuits.

Divide between the cheesecake cases and press the biscuit mixture down using the back of a teaspoon.

In a separate bowl, beat the cheese, cream, sugar and lemon. If you want to colour all the cheesecakes, add the food colouring now.
 
Divide the cheesecake mixture between the cases. If you are only making one green, reserve a little of the cheesecake mixture in the bowl, add the food colouring then fill the final cheesecake.

Refrigerate until ready to serve.
 
 
I'm sharing these with Treat Petite, hosted by Kat the Baking Explorer and also with Cook Blog Share.

Monday, 31 October 2016

Spooky Halloween Doughnuts


I wasn't going to do any more Halloween baking this year but saw a video tutorial from Wilton, the US cake decorating brand, on Facebook for doughnuts and realised I had the doughnut tin that they used in the recipe. So I made a quick batch of baked doughnuts - they are quite easy to make as you bake them in the oven, so no hot oil to deal with - and decorated them as spider webs and pumpkins. Easy to do, and fun for the kids to join in with. You can even hand these out to any trick or treaters who come knocking!

I used this recipe from the Wilton website. Translated for UK bakers (we don't have 'cake flour' over here, you need:

2 cups (300g) plain flour
3/4 cup (175g) caster sugar
2 tsp baking powder
1/4 tsp ground nutmeg
1 tsp salt
3/4 cup (175ml) buttermilk
2 tbsp. butter, melted

to decorate:
icing sugar
water
black and orange food colouring (gel works best)

Preheat oven to 220C. Mix the dry ingredients in a large bowl and then beat in the buttermilk and butter until you have a thick batter.


To decorate, lay some kitchen towel or newspaper under your cooling rack as the icing will drip through. Mix icing sugar with a few drops of water, adding a few more drops until you have a thick and slightly runny consistency, that drops off the spoon but isn't liquid. Separate into three bowls with two containing more icing than the other - the smallest bowl is the one you will leave white.

Add orange food colouring (I used Wilton gel colour) to one bowl and black to another and beat in. Use a teaspoon to drizzle the orange icing over half the doughnuts. If you like you can add a green stalk for the pumpkin or even edible eyes if you have them or want to make them from fondant!


Cover the remaining doughnuts with black icing. While it is still tacky, spoon the white icing into a piping bag and snip off the end so you have a small opening. Pipe concentric white circles onto the black doughnuts. Take a cocktail stick (toothpick) and drag lines through the icing from the outside to the inside; this will give a spiderweb effect. Leave the icing to set and enjoy!

Grease a doughnut pan with Cake Release or similar and fill the holes until 3/4 full. Bake in the preheated oven for 7-9 minutes until risen and springy. Allow to cool in the pan for 5 minutes then cool on a cooling rack.


I'm sending these as a last-minute entry to the Food Calendar challenge hosted by Charlotte's Lively Kitchen.

Sunday, 30 October 2016

How to Carve a Halloween Pumpkin


Before this year, I'd only carved a Halloween pumpkin once before and used a kitchen knife to make very crude triangles for eyes and a nose and some sort of jagged mouth. It really wasn't very good, yet year after year I've been marvelling at my friend Julianne's amazing creations. She carves brilliant designs and has done everything from spooky scenes to cartoon characters to Game of Thrones.

This year I asked her advice and spent a very enjoyable afternoon at her house learning the tricks of pumpkin carving. There are some basic rules or pieces of advice to follow, and after that it's just a case of patience and a steady hand!

The right tools are essential but not expensive. Julianne has invested in a set of proper wood carving tools, as she is now at the stage where she is adding shading to her pumpkin designs, but I used a simple set of pumpkin carving tools that only cost £2 in Sainsbury's (on sale right next to the pumpkins).


You get a scoop, two mini saws (one finer than the other), a cutting wheel and a poking tool. The set also comes with a book of stencils which are a mixture of easy and a bit more complicated (if you want really complex ones or something more topical, look online. Some of the Donald Trump pumpkins I've seen this year are brilliant!).

 
To start, use a large kitchen knife to cut the lid off the pumpkin. Angle the knife rather than hold it vertically; this will allow the lid to sit better. When you have taken the lid off cut the stringy bits of pumpkin off it.

Use the scoop to remove the seeds and stringy inside of the pumpkin - we ended up with a bowlful. Keep scraping until the inside of the pumpkin is clean - you will need to get your hands right inside the pumpkin as well to get all the stuff out.

We found it easier to do this on the floor, with a plastic sheet (a children's play mat, but you can use anything) to stop the mess getting all over the floor.

When you've done that, choose your stencil and sellotape it on to the pumpkin. Use the poking tool to poke holes where you need to cut (usually the black parts of the stencil).


Remove the stencil, and use the mini saw to cut out the sections you have marked. I was going to start with the largest sections first thinking they would be easiest, but Julianne told me that would weaken the front of the pumpkin and make it much harder to cut the smaller sections. Instead, cut the smaller, more fiddly parts first, and don't push out the sections of pumpkin you have cut. Sometimes they fall out which is fine, but if you leave them in place, it does make it easier to cut the rest of the pumpkin.

When you carve, hold the saw at a straight vertical angle and cut down - this is why we were sitting on the floor as the easiest way is to hold the pumpkin in your lap.

When you have finished, use the poking tool to push out the parts of the pumpkin you have cut and discard (carving pumpkins don't tend to be that good for eating). Put a tealight candle or battery operated candle or even some glowsticks inside the pumpkin to light it up and replace the lid.

I had a lot of fun carving these pumpkins; they are not perfect but for a first time at doing it 'properly' I'm quite pleased!


Saturday, 29 October 2016

Rocky Road Halloween Graveyard Cake


If you haven't got much time for Halloween baking but want to make something as a treat, then look no further than this recipe. It would make a great centrepiece for a children's party - and goes down pretty well with adults too!

The recipe comes from the Konditor & Cook recipe book 'Deservedly Legendary Baking'. It's basically a rocky road, arranged to look like a grave site, with some bones and skeleton hands coming out of the grave!

 
You can find the recipe online here. I left out the glace cherries as I don't like them, and used large marshmallows cut in half rather than mini marshmallows. I didn't bother making the grass around the edge of the grave either.

The recipe states to use white marzipan to make the bones and gravestone but I don't even know where to get white marzipan and didn't have time to try making it myself. Instead I used white fondant.

 
It was very easy to make the bones - I just rolled some sausage shapes and used my thumb to press in the ends. I used black food colouring and a cocktail stick to write R.I.P. on the gravestone.

 
I hadn't really thought about the recipe in advance as I'd had an incredibly busy week at work but did manage to make the rocky road on Friday night so it could set overnight in the fridge. When I came to arrange and decorate it on Saturday I realised I should have made the tombstone from rice krispies. You can make a giant rice krispie cake by mixing the cereal with melted butter and melted marshmallows, and pressing it down tightly into a pan. Once it has set you can carve it into different shapes and cover it with fondant; this would be a great way of making an edible tombstone to go at the top of the grave. Of course the fondant I used is edible but I'm not sure I want to eat a giant block of icing!
 
I'm sharing this with the Food Calendar challenge, hosted by Charlotte's Lively Kitchen.

I'm also sending it to this month's Food 'n' Flix; Deb at Kahakai Kitchen has chosen Beetlejuice - the story of a couple who (spoiler alert!) wake up after an accident and find they didn't survive.


Sunday, 23 October 2016

Hoxton Street Monster Supplies Cookbook Giveaway and Halloween Chocolate Orange Tart


I've got a great giveaway just in time for Halloween where not one, not two, but three of you can win a spooky cookery book full of recipes and ideas for party food for Halloween and any sort of horror-themed party (movie night?) you might want to hold at any time of the year.

The Hoxton Street Monster Supplies Cookbook is worth £13 and is a beautifully illustrated 160 page hardback cookbook with over 70 recipes and humorous advice for entertaining.

Hoxton Street Monster Supplies claims to be London’s "and quite possibly the world’s only purveyor of quality goods for monsters of every kind." All profits go to the Ministry of Stories, a creative writing and mentoring charity for young people which looks absolutely brilliant; I would have loved something like this when I was a kid and am going to look into signing up as a volunteer.

The cookery book says it is a revised edition featuring recipes suitable for humans, but has plenty of advice for what to do if you are inviting the undead to your party - allow extra time for zombies to eat dinner as they tend to be very slow; never seat a cyclops next to a giant spider (cyclops are sensitive about the fact that they only have one eye) and so on.

Recipes are divided into chapters: sweets and pastilles (including crunching bone toffee and fairy brain fudge), biscuits and cookies  (phlegmy dodgers, gingerdead men and toenail macaroons), cakes and bakes (clotted blood cakes, fresh maggot brownies, which I couldn't bring myself to make, and spiced earwax pie, which looked like treacle tart from the recipe), jams and curds (including human snot curd and pickled eyeballs), savoury snacks (chunky vomit dip, small intestine skewers) and potions and poisons (eg satanic smoothie).

The recipe for brain cake, or rather 'braaaiiiinnnn cake', made me laugh - translated for use by zombies. The recipe runs: "Oooooooog. BBBRRRAAAIIINNNNS! Brraaaauuuunnnnns. AAR! Errrrrg" and so on. So I won't be attempting that one.

If you can get past the slight sense of revulsion that I felt when reading the names of some of the recipes (yes I know they are not serious but some are just gross!) and read the introduction to each recipe they are really funny - and I can assure you that the recipes contain perfectly normal ingredients! I think this would go down really well with children in particular so if you fancy being in with a chance to win a copy of the book scroll down to the end.
 

The giveaway is open to UK addresses only and the books will be sent to the winners directly by the publishers.

I decided to make one recipe from the book so I could review it, and since it was over a week until Halloween and I wasn't about to throw a party I decided to make one of the most normal sounding recipes: Night Terror Torte. This is basically a chocolate and orange tart, using a ready-made sweet shortcrust pastry base.


You slice two oranges and cook them in a sugar syrup (mixture of sugar and water); bake the pastry case blind and then make the filling from ground almonds, butter, sugar and eggs then dark chocolate. Add some of the orange slices which you have chopped while keeping the rest for decoration, and bake the assembled tart in the oven.

 
raw:
 
 
cooked
 
 
scroll down for the giveaway- starting at midnight tonight!


a Rafflecopter giveaway

Friday, 6 November 2015

Mini Pumpkin Stuffed with Cauliflower Rice


It may be a little late now but perhaps you have your Halloween pumpkin left over and are wondering what to do with it? Providing it isn't too past it - or you haven't left it out on your doorstep all night for passing wildlife to nibble on (or worse) then of course you can eat it!


I bought a couple of mini pumpkins or 'munchkins' from Sainsburys for 90p each which I thought were just the right amount for one person - though I forgot that once you scoop the seeds out, there's not a huge amount of pumpkin left. So I would do these as a side vegetable rather than as the main course -though you could use the same recipe with a larger pumpkin for a main course.


I roasted the whole mini pumpkin in the oven for about half an hour, by which point it was soft enough to cut in half and scoop out the seeds (if you can, just cut a small section off the top and scoop it out that way as it looks better when it's served).


For the filling, I mixed some cauliflower rice - which I explained how to make here, but in this case I bought a tub of it from Tesco - with some diced red pepper and red onion, though you can add whatever veg you like. I fried it until the peppers and onion were soft and then filled the pumpkin with it.

 I served it on a bed of spiralized carrot which I also bought in Tesco.


I'm sending this to the Extra Veg challenge hosted by Helen at Fuss Free Flavours - I don't often have entirely vegetarian meals and I don't even like pumpkin all that much but these are fun and seasonal so I can't resist!