Showing posts with label cake. Show all posts

Friday, 30 September 2022

The best Christmas cake recipe for beginners

This Christmas cake recipe is so good, that I was asked which posh London shop I had bought it from – which was nice because it was only the second Christmas cake I’ve ever made! The recipe is from BBC Good Food:  it’s so easy, I would recommend it for beginners. And if you are new to making Christmas cakes there might be one thing you don’t realise – yes it’s still a couple of months until Christmas, but you should make it now!

Christmas cakes are traditionally soaked in booze and you ‘feed’ the cake regularly over an extended period – so making it in October, or even earlier, is ideal. Of course, you don’t have to use alcohol and a good alternative is tea – I am also tempted this year to experiment with a flavoured tea of some kind, so that my four year old can have some of the cake. Though I am also tempted to make this recipe the same way that I did last year and just keep it out of her way, because it was amazing!
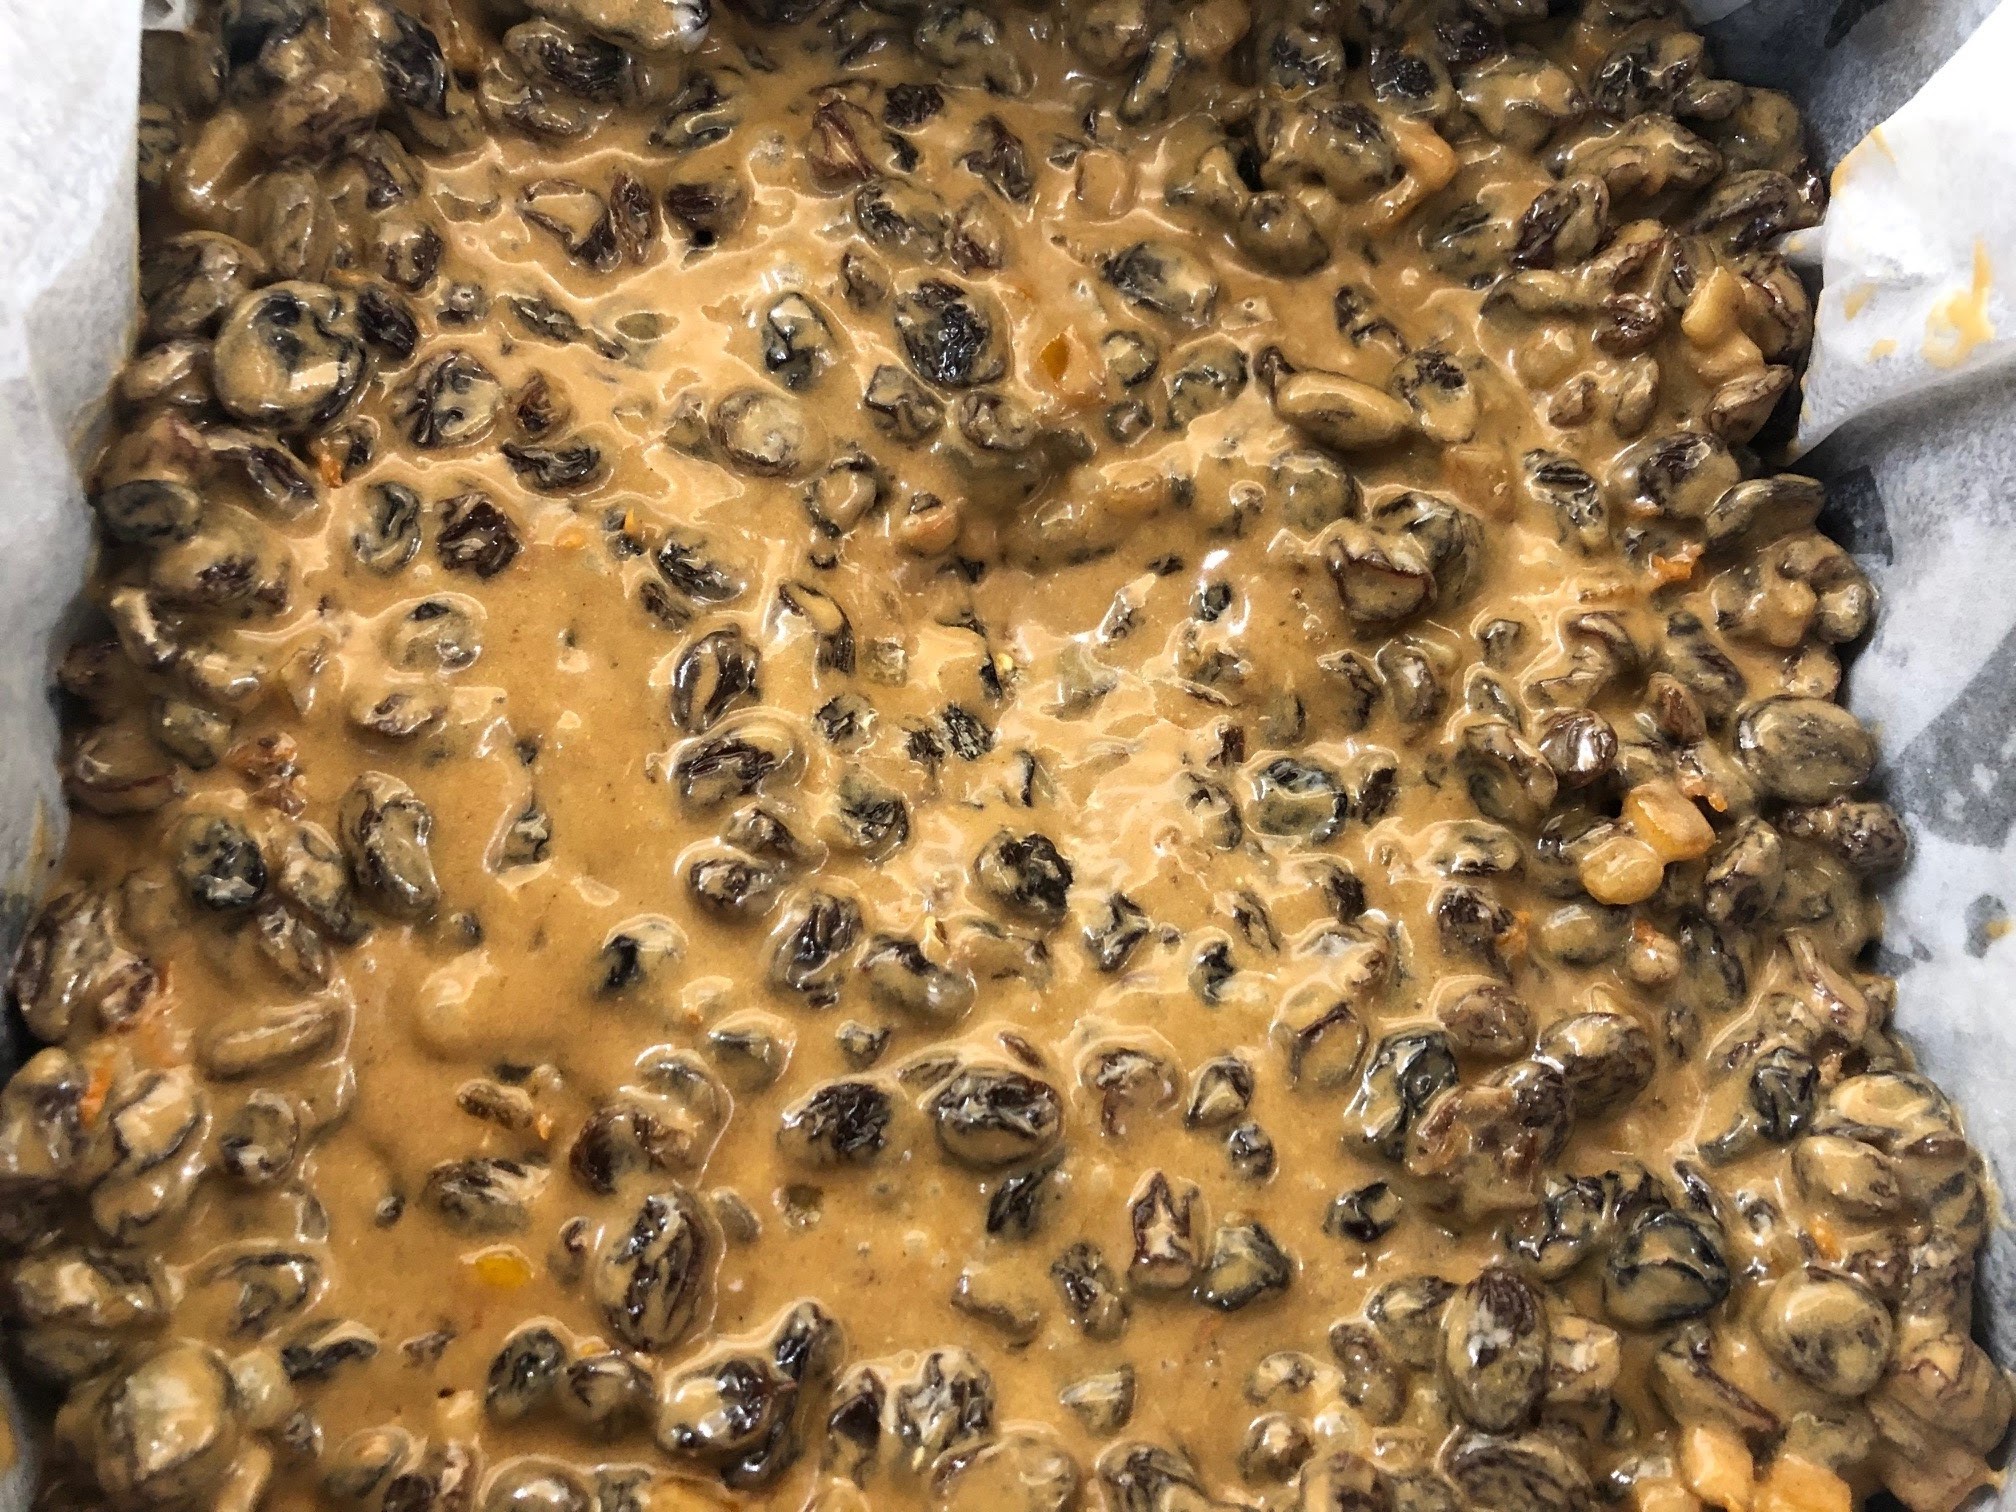
Instead of sherry, brandy or rum, I used amaretto – because I already had a bottle bought on a whim, and it’s not something I really drink. It gave the cake a lovely flavour – even though I made it quite late in the year, on 1 December (though it didn’t get eaten until January, as most of our Christmas plans in 2021 were cancelled due to our first (and only, touch wood) bout of Covid!

When it came to decorating, time was once again an issue. I had made it in a square tin so covered the cake with fondant that I then coloured gold with a packet of gold dust that came with the icing, and then cut out white fondant snowflakes using a plunger cutter to decorate the top. Everyone who tried the cake thought it was very good – myself included, and I don’t really like Christmas cake – though the best comment was from my sister, who said it was so good she assumed I had bought it, from an expensive London shop. So I think from now on this might have to be my go-to Christmas cake recipe, even if I switch up what I feed it with and how I decorate it!


Friday, 2 September 2022

Cherish Finden's Shiok - Expensive but worth it

Beautiful presentation, fantastic flavours but you will get a ‘shiok’ from the prices!

I had a £16 individual dessert in Bake Off Professionals star Cherish Finden’s new patisserie… and was it worth it? Find out what I thought of the Apple Tin below!

Cherish Finden is a celebrity chef known for her appearances as a judge on Great British Bake Off: The Professionals and as the pastry chef at London’s luxury Langham hotel. Her formidable demeanour combined with fabulous outfits and comments to the contestants that have launched countless memes have made her something of an icon, so when I read that she had opened a new patisserie just up the street from my office I decided to pay a visit.


Part of the Pan Pacific hotel but in a standalone building with its own entrance (so you don’t go into the hotel itself), Shiok! looks fairly unassuming from a distance, but as you get closer you can see rows and rows of perfectly formed sweet treats on the counter. There’s a seating area that gave off a peaceful, tranquil vibe - possibly because there was only one other couple in there on the weekday lunchtime when l visited. 

There are comfy chairs at the back and more formal hard chairs and little tables at the front, and the three staff hovering at the counter were friendly if a little intimidating - I watched one line up desserts in the display and check the distance between them with precision that the GBBO judges would have loved.


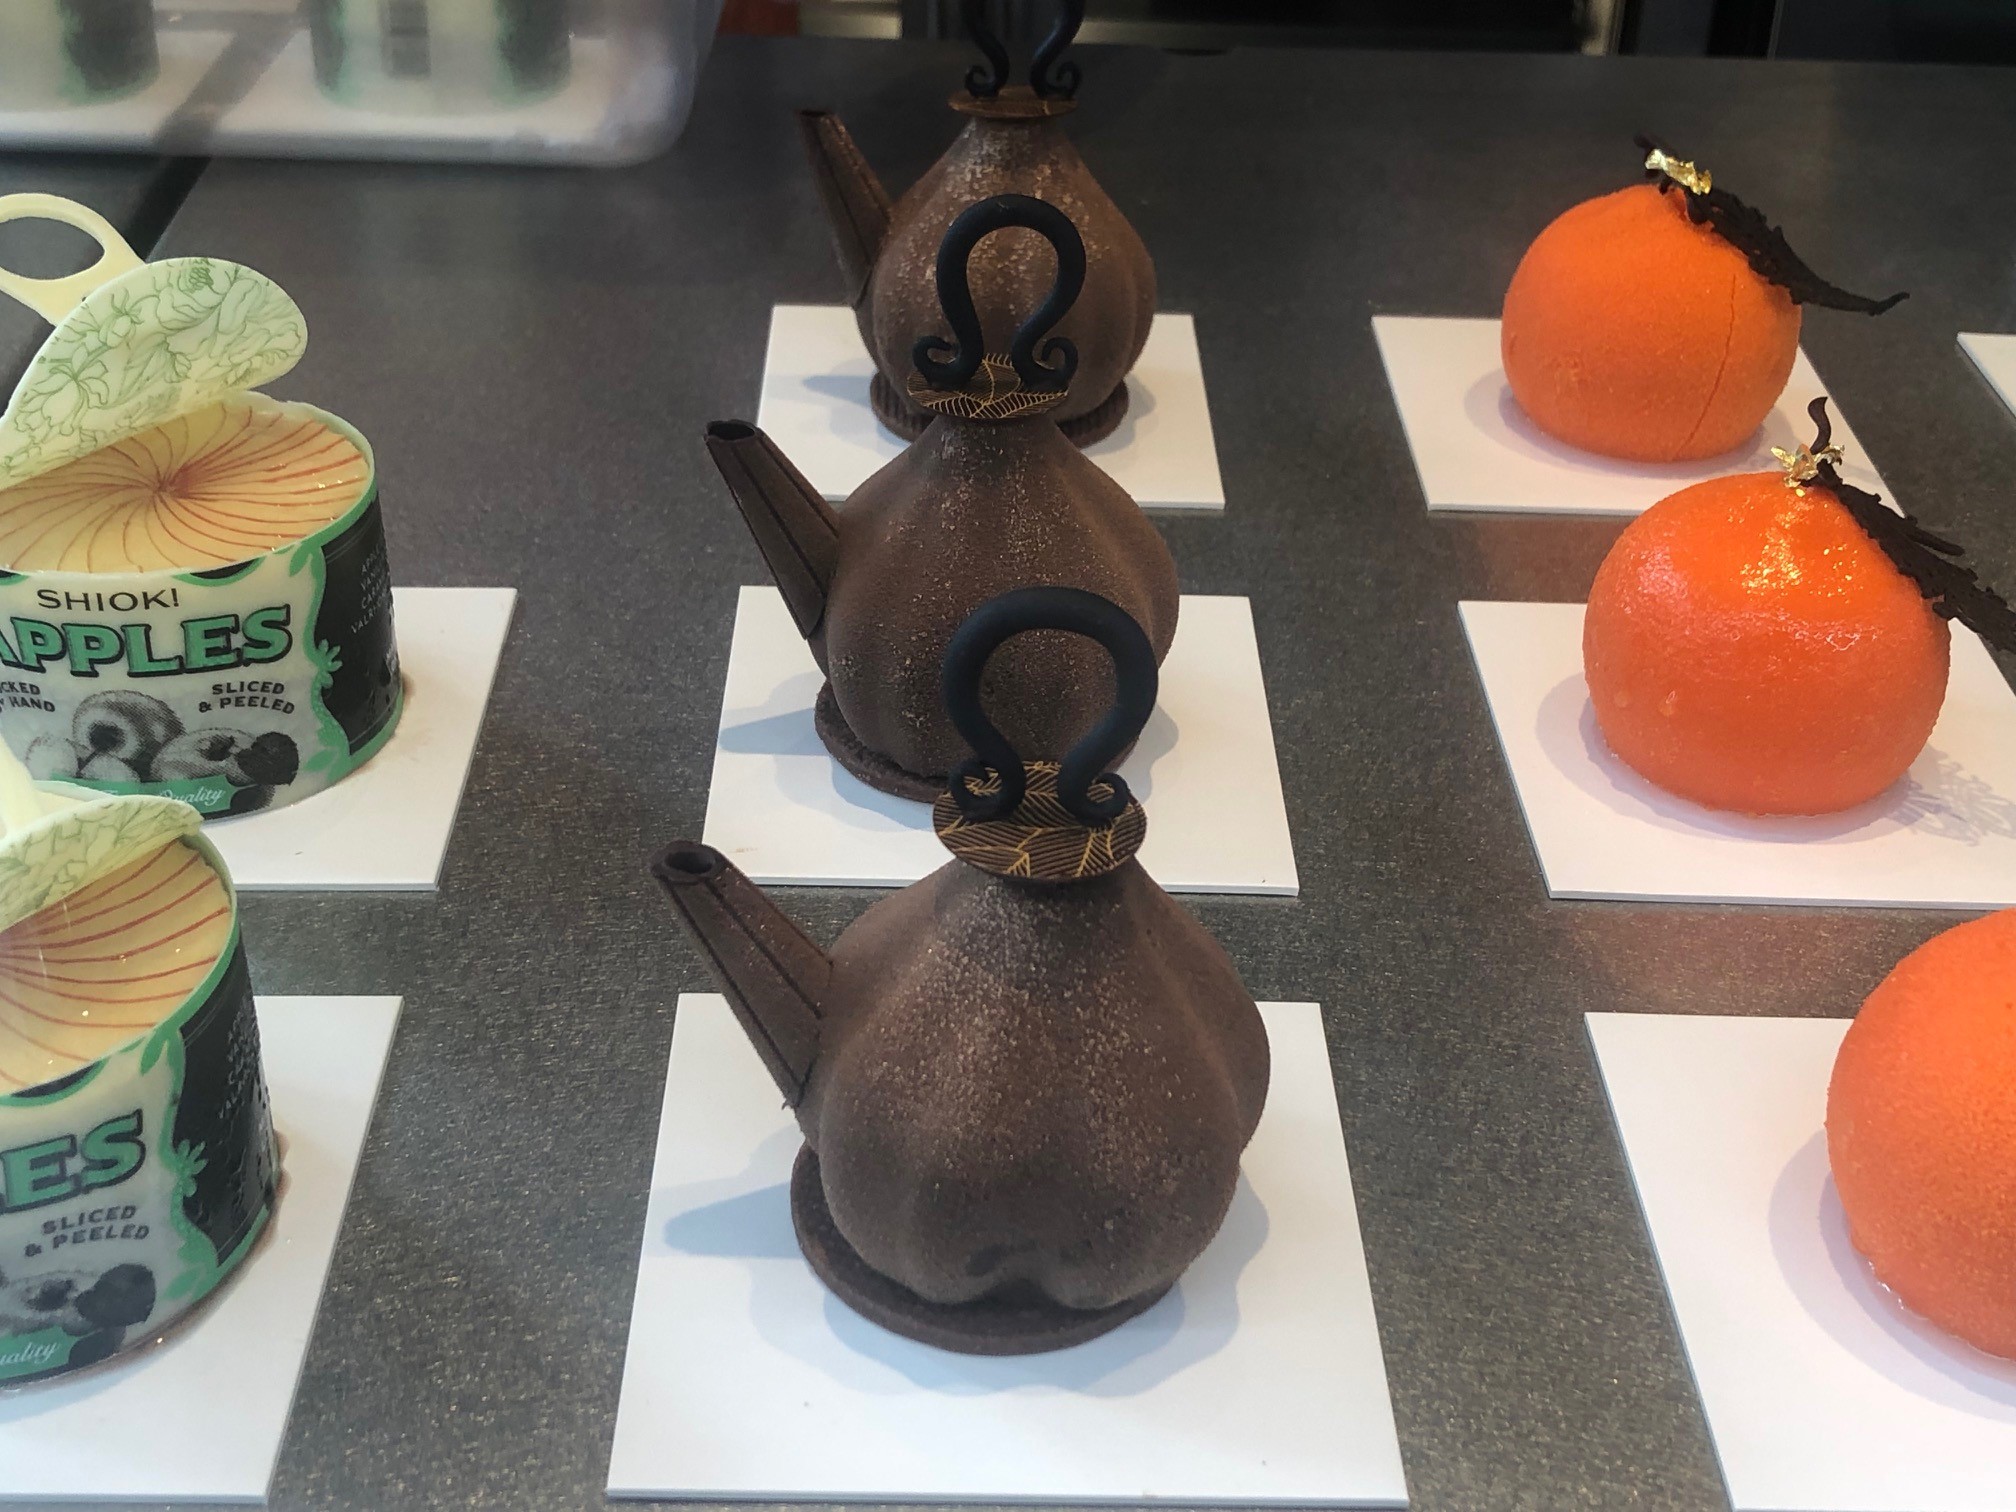
I spent some time admiring the display of treats, as much for their finesse and beauty as deciding which one I wanted to order. I have to admit having a bit of a ‘Shiok’ when I saw the price tags (this is not where the name comes from, and it apparently means ‘very tasty’, but perhaps it should be). Most of the patisserie was priced around the £15 mark and the one I chose was £16. Obviously aimed at the luxury market (I would say mainly tourists and business travellers) it is nonetheless an afternoon tea lover’s heaven. From traditional Singaporean biscuits to what looked like a chocolate tea pot, this is a feast for the eyes.


Cherish has revealed that the Apple Tin was inspired by her childhood where she would open a tin of lychees and eat them straight from the tin. Here, the tin itself is edible too- white chocolate printed with a design. Inside is caramel sponge, apple compote, apple slices and cinnamon crumble. Each mouthful was delicious, a perfect combination of flavours and textures, and at £16 it probably does scale up consistently from when you pay £50 for an afternoon tea for similar bite size patisserie (as the sandwiches and scones aren’t exactly the expensive part). Even do it was definitely a one off treat and not something I would spend that much on every week!

If you do get a chance to check out Shiok I recommend it - but don’t expect it to be cheap!

Sunday, 22 May 2022

3D Dinosaur Cake - Children's Birthday Cakes


The lockdown in 2020 meant I didn’t post anything on my blog for several months, as I tried to juggle a full-time job with a toddler at home every day for nearly three months while nursery was shut. So I’ve only just realised that I never posted anything about her birthday cake in spring of 2020 – better late than never!

Sophie is a big fan of dinosaurs, and from a young age has been able to correctly identify dinosaurs to the extent that I think she already knows more types than I do! We have encouraged her love of dinosaurs through toys and books and also a green dinosaur-patterned beanbag for her room to counteract some of the pink! If I recall correctly, she actually asked for a dinosaur cake for her second birthday, and I was happy to oblige!

We held her birthday party at My Gym, where we go to a class every week – it’s a cross between gymnastics, exercise, games and play, and they do brilliant birthday parties where you get an hour of gym-based games and half an hour in the party room with food and drink, and of course cake. I had the option of providing my own cake so of course that’s what I did.

I wanted a cake that would actually look like a dinosaur – I saw some lovely ideas online of round cakes with dinosaurs on top (either made from icing or plastic toys), where the cake itself was decorated to look like the dinosaur habitat. But I wanted instant recognition and wow factor, and decided it had to be a three-dimensional dinosaur. Luckily, it was easier to make one than I thought, thanks to this brilliant tutorial on WikiHow!

I baked a round vanilla sponge cake and then cut it up according to the tutorial instructions, then covered it in green roll-out fondant. I used yellow fondant to add some spots, and a darker green modelling paste – a kind of icing that is stiffer, so better to use when you are making something that needs to stand up – to make the spines along the dinosaur back. It wasn’t difficult or even massively time-consuming at all and I was really pleased with the finished cake, and I think the kids at the party all enjoyed it!


Sunday, 17 April 2022

Strawberry Milkshake Easter Cake

Having guests over Easter is always a good excuse for baking and I find cakes easier than desserts to make in advance. So I made this after work in the evening and decorated it first thing in the morning, in  time for my sister and niece to arrive.

The cake is a strawberry milkshake cake, so called because of the secret ingredient - Nesquik! (For those not familiar with this childhood staple, Nesquik is a powdered flavouring to add to milk, which comes in strawberry or banana flavour. It has been around since I was a child in the 80s, if not even longer!).

I recently made an Oreo cake for my husband’s birthday which I haven’t blogged about yet - it was the most delicious moist chocolate cake, and I decided to create a cake along similar lines. That cake used cocoa powder - and boiling water, to which I attribute the moistness - so for this one, as I wanted a fruity spring flavour but with an ingredient of a similar texture to cocoa powder and suddenly remembered Nesquik!

 This is the recipe I adapted, using Nesquik in place of cocoa powder, though I only used the recipe for the sponge and not the buttercream or chocolate ganache.

For the buttercream I made a standard butter and icing sugar combination, adding in some strawberry syrup for flavour and colour. I filled the three layer cake and then piped some swirls on the top, before colouring some more buttercream purple and green, to pipe more flowers and little bits of green (foliage, I guess) in between. 

I then decorated the top with Easter marshmallows (you could also use mini eggs if young children aren’t going to eat it) and a little pink glimmer sugar. The ‘hoppy Easter’ cake topper is a plastic sign that my husband printed for me with his new 3D printer, which I love!

Monday, 14 February 2022

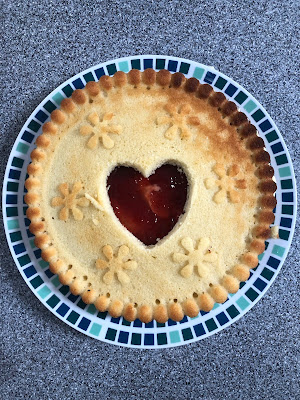
Jammie Dodger Heart Cake

This cake is inspired by Jammie Dodger biscuits, which have two layers sandwiched together with jam, and a heart shape cut out from the top biscuit layer to show the jam underneath. It’s very easy to make and fun for Valentine’s Day or someone who loves a Jammie Dodger biscuit!

I used a giant cookie silicon cake pan, which has two parts and lets you bake a cake where the sponges have fluted edging and flowers and also the word ‘cookie’ on the top so they look like giant biscuits.

I used a heart shaped cookie cutter to cut out a piece from the top layer to show the jam underneath.

The recipe itself is a pretty simple one:

175g butter, softened

175g caster sugar

3 eggs

175g self-raising flour

1 tsp vanilla flavouring

50ml milk

For the filling

150g butter, softened

300g icing sugar

Strawberry jam


Preheat oven to 180C.

Cream together the butter and the sugar then mix in the eggs one at a time with a spoonful of the flour each time. Fold in the remainder of the flour. Finally mix in the vanilla flavouring and the milk.

Spoon into two greased cake pans and bake for 20 minutes.

When cool, use a heart shaped cookie cutter or cut around a heart template to make a heart shaped hole in the top layer of your cake.

Cream together the butter and icing sugar to make buttercream and spread over the bottom part of the cake. Spread a layer of jam on top, making sure the jam is thick enough in the centre of the cake (where your heart shaped hole will go) that the buttercream can’t be seen. Place the top layer on top of your cake and enjoy.

Tuesday, 1 February 2022

Unicorn Birthday Cake - Cakes for Children


Last year my daughter had a ‘lockdown birthday’; COVID-19 restrictions meant that we couldn’t have a party, couldn’t have family to visit and couldn’t do anything much at all really. We still had a nice day, as we got Sophie a balance bike for her birthday, and were able to go to a local park to try it out. Of course I was still going to make her a birthday cake, and this year she asked (repeatedly) for a unicorn cake.

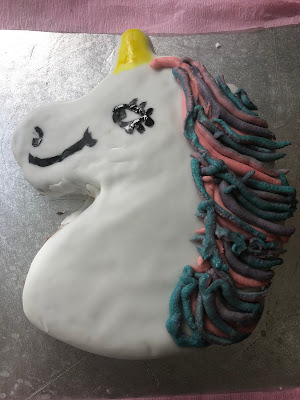
I’ve made a unicorn cake before, but thought this style was a bit grown-up for a three year old and possibly not even as instantly recognisable, so instead I invested in a unicorn cake mould to make it easier for myself. I bought a silicon mould from Ebay for around £7 which I thought wasn’t too bad; I’m sure I will end up using the mould again and if not I can pass it on to someone else. 

I wasn’t entirely sure of the quantity of cake mixture I would need to fill the mould, but luckily the scale of this BBC GoodFood recipe for an easy chocolate cake was just right. My daughter had requested a chocolate cake and I thought this recipe didn’t look too rich, compared to some others I have made in the past.

The cake was really easy to make and un-mould (I use PMW Cake Release spray to grease all my cake tins), and decorating was fairly straightforward too. I’m sure a more artistic person – or more professional cake decorator – could make a more beautiful unicorn, but my daughter loved this! 

The cake was covered in a chocolate buttercream and then rolled out white fondant. I coloured some buttercream in various colours and used a piping bag to pipe each section of the mane – after all, everyone knows that unicorns have rainbow hair! 

This photo has come out a little darker than the real thing – you can’t quite see the purple in with the blue and pink, but my daughter thought it was great. She also had a unicorn helium balloon and a few unicorn-related gifts, so referred to this birthday – and continues to do so several months later – as “my unicorn birthday”. 

The year before was “my dinosaur birthday” – when she had a dinosaur cake and several dinosaur-related gifts – and she has already told me that her next birthday, even though it is nearly six months away, is going to be “my Sofia birthday”. So I’m already squirreling away Sofia the First gifts and thinking about how to make a Princess Sofia cake!

Thursday, 24 June 2021

5th Anniversary Wooden Log Celebration Cake

The theme for a fifth wedding anniversary is wood so when my husband and I were celebrating that particular milestone recently I decided to make a cake based on the theme. There are a lot of ways you could interpret ‘wood’ - after all a lot of different things are made of wood - but to me the obvious choice was a woodland theme and a wooden tree stump!

This cake has vertical layers running through it which makes it a bit different - because it’s actually a Swiss roll cake on its side!

The recipe and general design came from a blog called Top with Cinnamon. It’s actually very easy to make this delicious cake - you make two Swiss rolls, cut them vertically so you have four strips, and roll them all up around each other with frosting in between. 

I didn’t make the coffee frosting in this recipe and instead added some cocoa powder as I wanted my daughter to have it and she’s too young for coffee (and probably wouldn’t like the taste anyway). I spread the ganache around the outside and on top and marked it with a fork to look like a tree trunk.

If I had more time to decorate I would have made woodland creatures out of icing but instead I used some mushroom shaped sweets (you can get these in most grocery shops) and made a ladybird, leaves and some tiny flowers out of icing (a flower plunger cutter made that last part very easy). Finally I added a ‘happy anniversary’ cake pick.

You can see the vertical layers when you slice into the cake - overall I’m really pleased with how the cake matches our anniversary theme!


Wednesday, 5 May 2021

How to make an Amazon parcel cake


We fall squarely in the camp of ‘how on earth did people manage before Amazon Prime?’. A combination of not wanting to go to shops during lockdown, working full time and not really wanting to spend my free time trawling the high street and a toddler who often needs stuff at short notice means we probably get more Amazon parcels than most. Then there is the fact that my husband actually works for a branch of the company so it’s not far from the truth to say that his bank statement looks quite funny.... money comes in from Amazon... money goes out to Amazon!
 
So when it came to his birthday there was really only one cake I was ever going to make. I'd seen a few pictures on the internet of cakes that look exactly like Amazon parcels, complete with shipping labels - which are all edible. The cake itself looked fairly simple, but the question was, where do you get edible Amazon labels to go on cakes?

 
It turns out that these are actually made of icing sheets, printed using edible ink. You can buy your own icing printer and edible ink and they aren't quite as expensive as I imagined - they seem to start at around £200. Which is a lot, but not prohibitively expensive if you were going to use it a lot. However, I knew I wasn't going to get much use out of one so couldn't justify buying one, and instead found someone selling what I needed on Etsy.

When I bought this in March I could only find one UK seller on Etsy making these, but now there seem to be quite a few, and I've found the same thing on Ebay as well. I paid £9 which was quite a bit for a cake decoration but I was happy to pay it for something this unique!
 
Making the cake itself is relatively easy - you need a square or rectangular cake tin, some roll-out fondant icing, some food colouring and that's about it - as well as your cake and icing ingredients.

My husband loves chocolate cake so I browsed the internet for a recipe that looked nice - I didn't want to use any of the really fudgy chocolate cake recipes I've made before that use a lot of melted chocolate in the cake batter, as our three-year-old daughter would be eating it too. So I wanted it to be delicious but not too rich, and used this recipe from Charlotte's Lively Kitchen, which was really good.
 
If you don't have a rectangular cake tin you can bake two square cakes and join them together, but you might have a bit of a dip in the icing where there is a join.
 
To cover the cake I mixed some fondant icing with a little gel paste in teddy bear brown. You can buy ready made icing by Renshaw in this colour but it's cheaper to add your own colour to white icing, at least if you will be using gel colours regularly (they tend to last a long time). I think the shade looks very similar to Amazon packaging!
 
As well as filling the cake with chocolate buttercream I spread a thin layer over the top and around the sides, then rolled out the fondant to cover it. All I then had to do was add the labels.


They came on an A4 sheet with instructions that said if I had difficulty in peeling the icing off the backing (which I did - it was impossible) to put the sheet in the oven at a particular temperature, and it would harden and come off the backing sheet easily. It worked perfectly, and I only needed to moisten the fondant on the cake a little to get the labels to stick. I was able to get them personalised, with my husband's name and birthday date.
 
My icing isn't perfect - I live in envy of people who can make perfectly sharp corners - but from a distance this looked very realistic, and my husband thought it was brilliant as he hadn't seen these cakes before!


Sunday, 13 December 2020

Christmas bauble cakes

There was a time when I always wanted the latest novelty cake pan or innovative piece of baking equipment from Lakeland - to be fair I still do want those things but am realistic to know I don’t have space for much more and don’t have time for the sort of elaborate bakes I used to do! But it’s fun to dig out equipment I haven’t used in a long time - or in this case had never actually used.

This is a silicon mini cake pan in the shape of Christmas baubles - I think I bought it in the January sale one year and had never actually used it!


The only instructions on the back said to use a two egg cake mix so I used this recipe from the BBC Good Food website  but had far too much cake mixture so made these reindeercupcakes as well.

I had to guess how long to cook them for as though the cakes are small they are fairly deep so I did them at 180C for 20 minutes.

You can see the design on the cakes when they came out of the pan - some baubles have stars, others stripes and two had a snowflake pattern that looks really pretty if you go over it with white icing with a fine piping nozzle.

I went over the other designs with icing with varying degrees of success. My piping has never been neat! These look quite effective when all piled together on a plate though I don’t think I’d have the patience to ice more than six, it would be a fun activity to do with children.


Thursday, 19 November 2020

Black Forest Gateau - GBBO 80s Week


It was the time of Kylie and Jason and Bros, drop-waist dresses with puff ball sleeves, Butlins holidays, Queen and Vanilla Ice, My Little Pony and Care Bears, candy necklaces and fizzy cola bottles, and what felt like endless summers running around outside with friends from your estate, running home just in time to watch 80 Days Around the World with Willy Fog or to beg mum for a coin p as you heard the ice cream van music playing.

In other words, I was a child of the 80s and so was really looking forward to Great British Bake Off’s 80s themed week. I wondered beforehand what they could be asked to make - these are the foods I most remember!

  • Viennetta
  • Vol au vents
  • Chicken kiev
  • Battenburg
  • Frozen pizza (deep pan, served with chips)
  • Black Forest Gateau
  • Melon slices with cherries on cocktail sticks
  • Speaking of which, cheese and pineapple cubes on cocktail sticks
  • Angel delight
  • Space invaders crisps
  • Panda pops
The list goes on.... if you remember the 80s, what were your favourites?

The actual challenges in GBBO were quiche, custard doughnuts and ice cream cake. I didn’t realise quiche was an 80s trend, though I do remember seeing one for the first time in the local bakery when I was a child and reading the label, getting the pronunciation wrong as I’d never seen the word before and asking my mum what a ‘quickie’ was, to her mortification! Though as someone with a modern languages degree I’m quite impressed that eight or nine-year old me read ‘quiche’ as ‘quickie’!

I didn’t think those kind of doughnuts were particularly associated with the 80s either, and other than Viennetta I don’t think I ever saw an ice cream cake in the 80s - and Viennetta isn’t really cake, it’s ice cream and thin layers of chocolate.

So when it came to my own bakealong I decided to make something different. I have strong memories of going to a couple of aunts’ weddings in the 80s and Black Forest gateau featuring prominently on the buffet table. I absolutely loved Black Forest gateau apart from one thing - I didn’t like cherries. But the cake was so moist, so chocolatey, I couldn’t resist - so I would always have a slice if it was on offer and carefully prise apart the layers and scrape the cherry filling out, then scrape the cherry off the top, then deposit both on my mum’s plate and wipe my fork with her napkin!

I still don’t like cherries and haven’t eaten Black Forest gateau for years - and have never made one, so it seemed a good idea to make for my GBBO bake along!

I used this Eric Lanlard recipe but didn’t use kirsch as I wanted my daughter to be able to eat the cake; instead I brushed the cake layers with cherry juice. I also didn’t want to use black cherries so bought a tin of black cherry pie filling, which did contain whole cherries but also a thick syrup that I used to sandwich between the layers of the cake. I saved the actual cherries to decorate the top of the cake - and of course picked them off when I came to eat it!

I think I might have forgotten to add the sugar to the cream and I didn’t think I could actually taste any cherry in the cake either from the juice or the filling! Which essentially made it quite a lot of faff for a chocolate cake with a fresh cream filling. But the grated chocolate around the outside and the cherries on top made it feel very 1980s! So I was fairly happy with this cake but if I made it again I might just use the cake recipe and skip the cherries entirely and fill it with chocolate instead!


Wednesday, 15 July 2020

Flamingo birthday showstopper cake


I celebrated my birthday during lockdown this year and it wasn’t too bad at all - I’m at home with my husband and two year old daughter who makes every day special. I had some nice presents, including an Instant Pot which I will blog about once I’ve used it a bit more, enjoyed a takeaway lunch from a nearby cafe and a takeaway dinner from a local Italian. My husband and I both took the day off work as well and it was nice not juggling working from home and looking after a toddler for the first time in a while!

This year my birthday cake was a chocolate cake from the supermarket - the first time in many years I haven’t made my own. But I had no free time before the big day and didn’t really want to spend hours in the kitchen on my birthday so was happy enough with a shop-bought cake.

But I’ve realised that I never actually shared the cake I made for my birthday last year, so here it is! It was a milestone birthday so I had an extended celebration, including a visit to my family, a weekend in a hotel with my husband and daughter followed by a weekend back in my home town with my school friends where we had a professional photoshoot, did an escape room and went out for dinner.

I made a cake to take with me as we were staying at a friend’s parents house while her parents were out of town (it’s like we were 16 again!). I settled quite quickly on a flamingo theme - I prefer llamas but I thought flamingos might make for a more glamorous cake!

One of my friends I was getting together with is vegan so I looked online for a suitable cake recipe and used this one from One Green Planet:

https://www.onegreenplanet.org/vegan-recipe/pink-strawberry-cake-vegan/

It was really moist and delicious and the perfect cake. 

Here’s how to decorate a flamingo cake:

To start with I covered the cake with buttercream but realised the sides were quite messy (I never understand how people get perfectly neat sides!). So partly to hide it, and partly for a fun nostalgic throw-back, I added a cake banner, if that is the correct term. We had one made of foil as a child that was put on every birthday cake for me and my sister year after year, and carefully cleaned and put away again – I can remember exactly what it looks like. I had some flamingo print wrapping paper which I used to the same effect, but of course as it’s paper it can’t really be cleaned and reused!

For the top of the cake I knew I wanted the centrepiece to be a flamingo. You can make one from flower paste or even a fat 3D one from fondant, but as I was in a bit of a hurry I decided to cut a flamingo shape out of cardboard. I did however make the wings, by melting white chocolate and adding a little pink food colouring. I placed a piece of greaseproof paper on a board and using a silicon brush, created the wings by sweeping the melted chocolate in the shape I wanted and leaving them to set. I did a few layers so the wings would be thick enough to pick up when they had dried, and I was able to stand them on the top of the cake to represent the flamingo’s wings just as I wanted.

For the final decorative touches I added mini meringues – again you can make your own and if you want this whole cake to be vegan (which makes sense given the recipe is vegan!) you can actually make vegan meringue. Did you know that? It’s actually quite surprising given meringue is usually made with eggs – you can make a very good substitute meringue from aquafaba, which is the liquid you get in a tin of chickpeas!

I also used some white chocolate buttons (which were vegan) to fill in a few spaces on the top. I was quite pleased with this cake as it delivered a lot of bang for its buck – it looked fairly impressive but didn’t take a huge amount of time to make or decorate and tasted delicious, so I’m glad I’ve been able to share it with you at last!


Sunday, 26 January 2020

Elderflower and white chocolate cake: Free Cakes for Kids

Think back to when you were a child and celebrated your birthday. I’ll bet there was cake, and you can probably remember some of your favourite cakes as a child, right? I was obsessed with Sarah Lee Double Chocolate Gateaux and often had one of those for my birthday but I also remember very clearly when my mum baked several loaf cakes to make the shape of the number 14, decorated with chocolate icing. I have a feeling I remember a hedgehog cake with chocolate buttons when I was younger as well!
Some children aren’t lucky enough to get a birthday cake, for all sorts of reasons - money is tight, they are living in temporary accommodation without the facilities to easily bake a cake, their families have got a lot on their plate due to illness or disability or maybe the child is a young carer themselves and deserves a treat. Free Cakes for Kids is an organisation that links up local amateur cake makers to provide birthday cakes for underprivileged children and makes sure they get a homemade treat on their birthday, which makes them feel special.

I’ve written about Free Cakes for Kids before as I’ve been involved with the group for a little while. To find out if there is a local group in your town check out the website.
For a little while now my local group has been baking a cake once a week for an Age UK tea party at a residential care home. I was just about to go back to work after maternity leave (yes, there’s been a bit of a delay in posting this!) and knew I wouldn’t have much time to bake any more so signed up to do one of these as it fell nicely into my last week off when my daughter was doing half days at nursery, so I could bake the cake and deliver it while she was there.

I wasn’t doing any grocery shopping for the next few days and rather than make a special trip out (which is not as quick as it used to be before I had a one year old in tow) so decided if at all possible to use ingredients I already had at home. I knew I had an unopened bottle of elderflower cordial in the cupboard and that I had seen recipes for elderflower cake somewhere.

I made Lynn Hill’s elderflower cordial cake with white chocolate ganache from the original Clandestine Cake Club book - you can find part of the recipe online here though to see the whole thing you will have to buy the book!
I found it interesting that the cake itself doesn’t use butter; it seemed to give a light texture to the finished cake but of course I didn’t get to eat any as it was for Age UK!
The white chocolate ganache was a little tricky as first it was too thick to spread (I left it too long in the fridge) then it was too runny. I wasn’t happy with the finish and decided I needed to decorate it but not in a way that would be too time consuming.
 
I loved the idea of piping ‘hello’ on the cake, since this was for a tea party and wasn’t a birthday cake, so I used some melted milk chocolate and a tiny piping bag. I then got out my special flower piping nozzles that make beautiful shaped petals of different kinds - you don’t have to have any special piping skills as the nozzles do all the work! The purple flowers were a bit darker than I would have liked as I used a bit too much food colouring but overall I was happy with the effects and hope the residents of the care home enjoyed their cake!


Saturday, 29 June 2019

1st Birthday Cakes - giraffe cake with giraffe pattern inside

My daughter got to have two birthday cakes for her first birthday, as had a party with her dad’s family one weekend and a celebration with my family (who live a few hours away and weren’t able to come to the first party) a week later. So of course I had to make her two cakes!
 

The first cake was decorated as a tribute to her favourite You Tube channel, Cocomelon. The channel consists of short animations of nursery rhymes, all a couple of minutes long, with the same characters – a family of five and various animals – cropping up regularly. Until she was about a year old this was pretty much all my daughter watched on TV – I wasn’t sure she would follow programmes that had episodes or dialogue, and she seemed to really like the songs. The channel’s logo looks a bit like a watermelon with a television screen face so I did my own version as a tribute, covering a cake in pale green fondant and adding dark green stripes and using flesh coloured fondant for the face. I bought a ‘1st birthday’ cake topper on two long sticks to go in the top, and of course a number 1 candle.
 

Baby S is allergic to egg and I wanted her to be able to try a little bit of the cake, so I used a vegan recipe for lemon cake that I’ve used before. I was careful not to let her try the icing as I thought it contained too much sugar, but I didn’t worry about reducing the sugar content of the cake itself as I thought she wouldn’t have more than a couple of mouthfuls. As it was, she wasn’t really interested in eating the cake at all! (Since then five months later she had some of her granny’s birthday cake and really liked it).


I can’t seem to find the recipe anywhere now but it’s quite easy to search for vegan lemon cake recipes online.


For her second cake, I didn’t make it egg-free since I correctly assumed baby S wouldn’t want to eat any. In the end when we had the cake at her grandparents’ house I think she was getting ready for a nap.


I wanted the cake to represent something else that my daughter liked and remembered she was really attached to her Sophie the giraffe – she has two in fact. She seems to have lost interest in the giraffe over the past few months and prefers to play with other toys but there was a time when she was happiest clutching the giraffe in her little fist and waving it aloft.


It’s fun to make cakes with a surprise inside – particularly in this case because my two-year-old niece would be there and I thought she might enjoy it. It’s a lot easier than you might think to make a polka dot effect inside a cake – or in this case, giraffe print.


So how do you make a cake with a giraffe pattern inside? I used a standard vanilla cake recipe, and split the batter into two bowls, adding cocoa powder to one to turn it chocolatey. For this cake, you want to have about two thirds of your batter yellow vanilla and a third chocolate – I also added a bit of yellow food colouring to the vanilla batter.


If you want a perfectly even pattern – almost a chequerboard effect – inside, then you pipe concentric rings of alternative colours around your prepared (greased) cake tin. As I wanted the giraffe print to be a more natural random pattern, I put a layer of vanilla cake in the bottom, piped some very uneven circles of chocolate cake batter and then a layer of vanilla over the top. You can see what this looks like when it has baked, and here it is after I sliced the top off the cake to make it flat – and then the inside when it was sliced.


I covered the cake in white fondant and decided to turn the giraffe itself into the number 1, so I cut a 1 out of yellow fondant and added brown spots as well as ears, a face and hair. I don’t think giraffes have hair quite like that down their backs but never mind! I decided the rest of the cake looked a bit plain but I hadn’t left enough room for my daughter’s name (if you have a one year old, you will understand the rush things have to be done in while they nap!). So I used some of the leftover green fondant from her other birthday cake to make some trees and used a butterfly plunger cutter to do some little pink butterflies at the top. I was quite pleased with how it looks overall and have printed out some photos for my daughter’s baby book so when she is older she can look back and see what cake and presents she had for her first birthday!

Saturday, 13 October 2018

Easy Loaf Tin Carrot Cake


This is a very easy carrot cake using ingredients you probably already have in the cupboard and fridge that takes very little time to throw together. It was really light and moist and absolutely delicious!

I didn’t actually realise it was a loaf cake until I was part way through the recipe but it makes baking and decorating it much easier. I made this while my baby daughter was having a nap, as my mother in law was having friends over the following day and had invited us to drop in and mentioned not having had time to make a cake so I wanted to help (though in the end she made a fantastic coffee cake as well!).

This recipe comes from the Abel and Cole Cookbook, which I bought (I think on a special offer) back in the days when I had a veg box delivered every week. These days it doesn’t seem worthwhile as my husband is very fussy particularly when it comes to veg and we wouldn’t get through even their smallest box, though now we’ve started weaning our daughter maybe it is something to look into again!

Abel and Cole has a similar recipe on their website where they say they spruced up the recipe from their first cookbook, which is the considerably simpler one that I made.

 
This is what I did:

You need:
185g sugar
180ml vegetable oil
2 eggs
150g self-raising flour
130g grated carrots
1/2 tsp baking powder
1/2 tsp bicarbonate of soda
1/2 tsp salt
1 tsp ground cinnamon

for the icing:
175g cream cheese
175g butter at room temperature
225g icing sugar
1/2 tsp vanilla essence

Preheat oven to 180C. Beat the sugar, oil and eggs together until well combined, then fold in the flour. Stir in the grated carrots, the baking powder, bicarb of soda, salt and cinnamon.

Grease a loaf tin - I use PME Release A Cake Spray 600 ml - and pour in the cake mix. Bake for 30 minutes, testing with a skewer, then turn onto a wire rack to cool.



To make the icing beat together the cream cheese, butter, icing sugar and vanilla. Slice the cake through the middle (this wasn't in the original recipe but I decided to do it and loved it) and spread over one half of the cake and sandwich together then use the rest to cover the top of the cake.

 
 I'm sharing this with Baking Crumbs hosted by Only Crumbs Remain and CookBlogShare hosted this time by Monika at Everyday Healthy Recipes.


Tuesday, 28 August 2018

Vegan Chocolate Baby Shower Cake

 
One of my friends has just had her second baby, another boy, the day before her own birthday. We - my group of school friends - all went to see her a couple of weeks ago for a combined birthday and baby shower celebration.

I wasn’t sure if I was going to be able to go until the last minute as we already had two other things on that weekend - a relative visiting and my father in law’s birthday - but we were able to arrange things so that we were able to go.

Making cakes for celebrations when we get together is usually my thing so I couldn’t turn up empty handed, but I didn’t have the confidence I would have enough time in between taking care of my five month old to make anything really elaborate so I decided to keep it simple.

One of my friends is vegan and I remembered seeing a recipe for a vegan chocolate cake in Tea with Bea, the recipe book from the Bea's of Bloomsbury café.

I'm also publishing this recipe on my new parenting blog, Mini Moo Life - if you're interested in all things baby, parenting and family related, hop on over and have a look! Or follow the blog on Twitter @MiniMoo_Life or Instagram @mini_moo_life.


I used white wine vinegar instead of the red wine vinegar given in the recipe as I had a bottle in the cupboard already (and white wine vinegar is often used in vegan baking so I knew it would be ok). I made a simple vegan buttercream from Pure dairy-free spread, icing sugar and cocoa powder.

The guideline cooking time was given as 40-55 minutes with an extra 5-10 minutes if necessary, which is quite a large range. I found the cake needed the full 65 minutes, in fact I think I left it in even for slightly longer and it was still really light and moist.

I bought a gold cake pick with the word 'baby' from my local party store to go in the top and sprinkled the top with edible gold lustre dust. The cake tasted really good - if you are new to vegan baking and need reassuring, this cake tastes even better than a lot of non-vegan chocolate cakes!

Here's what I did
To make one 8 or 9 inch cake you need:

275g plain flour
100g cocoa powder
2 tsp bicarbonate of soda
1 tsp baking powder
pinch of salt
450ml soya milk
2 tsp red wine vinegar (I used white wine vinegar)
320g caster sugar
320ml sunflower oil (I used vegetable oil)
2 tbsp. vanilla extract

For the buttercream
200g vegan spread eg Pure
400g icing sugar

Here's what I did


Preheat oven to 160C. Mix the flour, cocoa powder, bicarb of soda, baking powder and salt in a large bowl.

In another bowl, mix the soya milk, vinegar, sugar, oil and vanilla, whisking until combined.

Fold into the dry ingredients and mix well.

Grease an 8 or 9 inch cake tin and spoon in the prepared mixture and bake for 45 minutes to 1 hour (I've increased the cooking time slightly from the original recipe). Test the middle with a skewer and bake for another 5-10 minutes if needed.

Allow to cool in the tin then turn out onto a baking rack.

When cool, make the buttercream - cream together the marg and icing sugar. Carefully slice the cake through the middle and spread with the buttercream.

You can spread buttercream over the top and around the sides as well if you wish; I left mine plain and decorated the top with edible gold lustre powder.


I'm sharing this with the final We Should Cocoa linkup over at Tin and Thyme and also with CookBlogShare over at Easy Peasy Foodie.

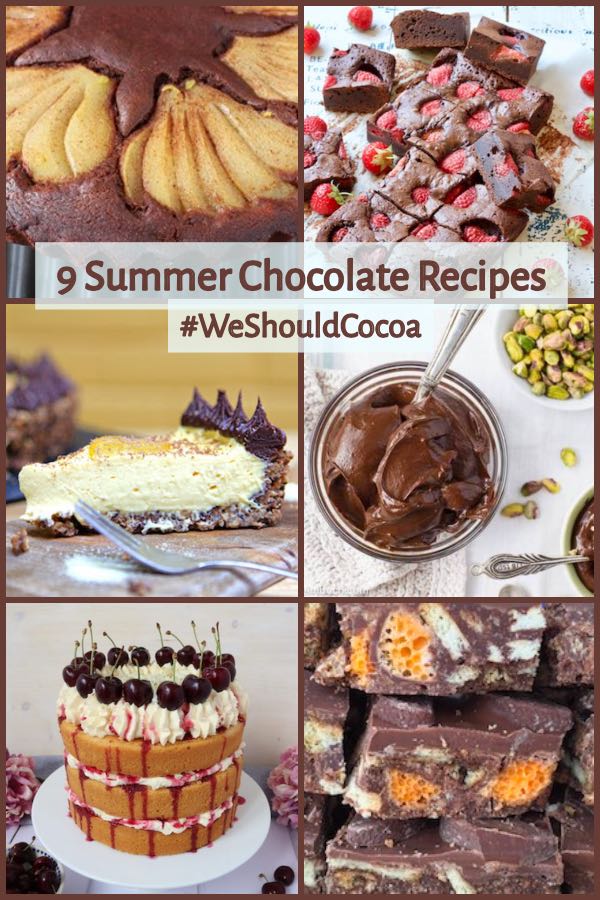
9 Summer Chocolate Recipes for We Should Cocoa #WeShouldCocoa #chocolate #recipesCook Blog Share Linky