Showing posts with label surprise inside. Show all posts

Saturday, 29 June 2019

1st Birthday Cakes - giraffe cake with giraffe pattern inside

My daughter got to have two birthday cakes for her first birthday, as had a party with her dad’s family one weekend and a celebration with my family (who live a few hours away and weren’t able to come to the first party) a week later. So of course I had to make her two cakes!
 

The first cake was decorated as a tribute to her favourite You Tube channel, Cocomelon. The channel consists of short animations of nursery rhymes, all a couple of minutes long, with the same characters – a family of five and various animals – cropping up regularly. Until she was about a year old this was pretty much all my daughter watched on TV – I wasn’t sure she would follow programmes that had episodes or dialogue, and she seemed to really like the songs. The channel’s logo looks a bit like a watermelon with a television screen face so I did my own version as a tribute, covering a cake in pale green fondant and adding dark green stripes and using flesh coloured fondant for the face. I bought a ‘1st birthday’ cake topper on two long sticks to go in the top, and of course a number 1 candle.
 

Baby S is allergic to egg and I wanted her to be able to try a little bit of the cake, so I used a vegan recipe for lemon cake that I’ve used before. I was careful not to let her try the icing as I thought it contained too much sugar, but I didn’t worry about reducing the sugar content of the cake itself as I thought she wouldn’t have more than a couple of mouthfuls. As it was, she wasn’t really interested in eating the cake at all! (Since then five months later she had some of her granny’s birthday cake and really liked it).


I can’t seem to find the recipe anywhere now but it’s quite easy to search for vegan lemon cake recipes online.


For her second cake, I didn’t make it egg-free since I correctly assumed baby S wouldn’t want to eat any. In the end when we had the cake at her grandparents’ house I think she was getting ready for a nap.


I wanted the cake to represent something else that my daughter liked and remembered she was really attached to her Sophie the giraffe – she has two in fact. She seems to have lost interest in the giraffe over the past few months and prefers to play with other toys but there was a time when she was happiest clutching the giraffe in her little fist and waving it aloft.


It’s fun to make cakes with a surprise inside – particularly in this case because my two-year-old niece would be there and I thought she might enjoy it. It’s a lot easier than you might think to make a polka dot effect inside a cake – or in this case, giraffe print.


So how do you make a cake with a giraffe pattern inside? I used a standard vanilla cake recipe, and split the batter into two bowls, adding cocoa powder to one to turn it chocolatey. For this cake, you want to have about two thirds of your batter yellow vanilla and a third chocolate – I also added a bit of yellow food colouring to the vanilla batter.


If you want a perfectly even pattern – almost a chequerboard effect – inside, then you pipe concentric rings of alternative colours around your prepared (greased) cake tin. As I wanted the giraffe print to be a more natural random pattern, I put a layer of vanilla cake in the bottom, piped some very uneven circles of chocolate cake batter and then a layer of vanilla over the top. You can see what this looks like when it has baked, and here it is after I sliced the top off the cake to make it flat – and then the inside when it was sliced.


I covered the cake in white fondant and decided to turn the giraffe itself into the number 1, so I cut a 1 out of yellow fondant and added brown spots as well as ears, a face and hair. I don’t think giraffes have hair quite like that down their backs but never mind! I decided the rest of the cake looked a bit plain but I hadn’t left enough room for my daughter’s name (if you have a one year old, you will understand the rush things have to be done in while they nap!). So I used some of the leftover green fondant from her other birthday cake to make some trees and used a butterfly plunger cutter to do some little pink butterflies at the top. I was quite pleased with how it looks overall and have printed out some photos for my daughter’s baby book so when she is older she can look back and see what cake and presents she had for her first birthday!

Tuesday, 7 November 2017

Baby Cow Gender Reveal Cake - For My Own Baby!


There’s a big trend at the moment for gender reveal parties, in the US at least. I’m seeing more and more posts and pictures on the internet where couples expecting a baby reveal whether it’s a boy or a girl in front of their family and friends – often in quite creative ways. For instance, when the gender is discovered at the antenatal scan, rather than tell the parent(s), the sonographer places the result into a sealed envelope. The parents give the envelope to a bakery, which makes a cake that has either neutral or both pink and blue decorations on the outside, but the cake inside is dyed either pink or blue, and often has sweets in the centre that tumble out. It’s only when the couple actually cut into the cake and see what colour is inside that they find out whether they are having a boy or a girl.


Another reveal method is for the couple or mum to stand surrounded by family and friends (usually outside) holding a large helium balloon that is opaque – often black or patterned. They burst the balloon and are showered with either pink or blue confetti – again having had no idea themselves what the gender would be.

Those seem really fun if you want to make a thing of revealing the gender in front of your loved ones, but the idea of not knowing ourselves was a bit strange to me – and gender reveal parties aren’t really a thing in the UK. Nonetheless, I decided I wanted to make a gender reveal cake – but rather than give a sealed envelope to a bakery, my husband and I would find out at our 21-week scan and I’d bake a cake that evening.

I wanted to fill the cake with sweets that would tumble out when it was cut, and I found getting hold of pink sweets was easy but blue surprisingly hard! As I was making the cake in the evening I wanted to have both colour sweets already to hand, so a few weeks before the scan started having a look on the internet and online in supermarkets. There are loads of pink sweets available, from strawberry bonbons to a giant tube of purely pink Smarties, but there didn’t seem to be a blue equivalent – at one point the closest I thought I was going to get was mint tic-tacs! Of course, I could have gone to M&M World in Leicester Square – where you can buy M&Ms by weight in any colour you like – and I do work in London but getting to Leicester Square is a bit of a pain and the shop is busy, full of tourists and generally not somewhere I want to go if I can help it.

Luckily I spotted an old fashioned-style sweet shop called Hardy’s near my office – there are a few of these around. They had giant jars of all kinds of sweets against one wall, including pink strawberry bonbons and blue raspberry bonbons, so I bought a bag of each.

I also wanted to plan the cake and buy the ingredients in advance – it might have been nice to have the option of baking both a pink strawberry cake and a blue raspberry-flavour cake but I decided to take the easy option and make a lemon cake.

I used this recipe from Good to Know, though I didn’t do the lemon syrup due to lack of time, and realised the lemon curd in my fridge was out of date and I didn’t have time to make more, so I made a simple lemon buttercream for the filling.

 
I made up the batter, adding lemon zest and a bit of lemon juice, and then added some gel food colouring before the mixture went into two cake pans.

 
When it was baked and cooled, I used a glass to cut a circle out from both layers of cake, going right through the top layer and part way through the bottom layer. I spread lemon buttercream icing on the bottom layer and sandwiched the other cake on top, then filled the hole I’d cut with the sweets, replacing a thin slice of the disc I had removed so the cake would be flat on top.
 

The rest of the buttercream went on the top and around the sides of the cake so I could cover it with a large piece of rolled white fondant. As my surname is Cowe – pronounced cow – this had to be a cow-print cake, like my wedding cake last year! But instead of black and white I made the patches a mixture of pink and blue. I used the same cutters from the Lakeland ‘make your own cookie cutter’ set that my sister and I used on the wedding cake last year – lovely to think that the cutters were coming out again for such a special reason!

 
It was already 9pm and I was watching the Apprentice when I decided the cake did need a baby cow topper as well, so I moulded the animal – complete with baby bottle – while sitting in front of the TV. It’s not my best creation but given it wasn’t even going to be seen very long (I was taking the cake into work, not having a gender reveal party) I didn’t think it mattered much. I also made four alphabet blocks spelling ‘baby’- I thought the cake looked quite pretty and it didn’t actually take that long.

So here’s what you’ve no doubt been waiting for…. when the cake was cut the first slice revealed the colour inside was…. Pink!  We are having a little girl.


The cake tasted really nice and it was fun to see people’s reactions and to be able to share our news!

I'm sharing this with CookBlogShare hosted by EasyPeasyFoodie.

Sunday, 22 October 2017

Mini Trick or Treat No Bake Lemon Cheesecakes for Halloween Party

 
Party food for Halloween parties is pretty easy, I think - as well as all the usual suspects (sausage rolls, sandwiches or mini burgers or quiche or whatever) and then any kind of 'scary stuff'. Here's an idea that's hopefully a little bit different.

I wanted to make something a bit different for Halloween but wasn’t quite sure what. I was in Iceland picking up a few groceries and saw these on the Halloween display: a pack of six mini plastic pumpkins, which you can fill with treats (or tricks!) and use as a game, a bit like an Easter egg hunt perhaps. They were only £1 so I bought them. I had a better use for them though – use them to serve desserts!
 
 
Of course these are plastic and can’t go in the oven but my mind went straight away to no-bake mini cheesecakes. When I got home I devised the following recipe.


I made, and served, each mini cheesecake inside the pumpkins – I went with a lemon flavour with a ginger biscuit base, but you could always do pumpkin flavour cheesecake or anything you like. I wanted to make one of the six a ‘trick’ rather than ‘treat’ and thought about putting a small plastic spider inside to surprise the recipient – but didn’t think that would go down too well with my husband!
 
Instead I decided to colour one of the cheesecake toppings green with food colouring. You could easily do that to all of them for a children’s Halloween party, but I thought it would be a nice touch when I served the mini cheesecakes in the closed pumpkins, if everyone chose their own and when one person opened theirs, they got a bit of a surprise!

Here’s the recipe I came up with

Mini no bake Halloween lemon and ginger cheesecakes - an original recipe by Caroline Cowe @Caroline Makes


Makes six mini cheesecakes

You can also make these mini cheesecakes in paper cupcake cases, or ramekins, or anything you think will work!

6 McVitie’s ginger biscuits
2 level tbsp. butter or marg, melted
175g cream cheese
60ml double cream
50g caster sugar
Juice of ½ lemon (or more to taste)
Couple of drops of green food colouring if desired


Crush the biscuits either in a food processor or with the back of a wooden spoon. Melt the butter either in a small pan over a low heat or in the microwave and stir in the crushed biscuits.

Divide between the cheesecake cases and press the biscuit mixture down using the back of a teaspoon.

In a separate bowl, beat the cheese, cream, sugar and lemon. If you want to colour all the cheesecakes, add the food colouring now.
 
Divide the cheesecake mixture between the cases. If you are only making one green, reserve a little of the cheesecake mixture in the bowl, add the food colouring then fill the final cheesecake.

Refrigerate until ready to serve.
 
 
I'm sharing these with Treat Petite, hosted by Kat the Baking Explorer and also with Cook Blog Share.

Sunday, 13 March 2016

Easter Mini Egg Ombre Pinata Cake

Easter showstopper mini egg ombre pinata cake

Making something very elaborate for a bake off at work is hard when you have to finish it on a weeknight after work and transport it by train and bus into the office. I thought about making essentially the same cake as last year's winning entry again, but with mini eggs – I still intend to do this, but thought it was a bit of a cop-out for the bake off as it was really just the same thing I’d done last time. As I won last time I also thought the judges wouldn’t award first prize to the same cake again – forgetting that last time the bake off was a departmental one, and this time was sort of company-wide (being held in 4 of our largest offices at the same time), with different judges who wouldn’t have seen my malteser cake!
 
By the time I’d remembered that I’d already decided to make something else though, that didn’t actually take that long to make and wouldn’t be too fragile to transport. I came across a brilliant Easter ombre piñata cake on Taming Twins, and essentially just copied that. So I’m not going to reproduce Sarah’s recipe and instead suggest you hop on over to her site; she’s even done a video showing you just how you get the mini eggs inside.
I did take a few photos as I went along the way, so you can see how the cake came together and how I coloured each layer.

Adding food colouring to the cake batter and baking each layer:


Make a hole in two layers of cake cutting around something like a glass or an egg cup

Place a complete layer of cake on the bottom, spread with buttercream, then do the same with the two layers with holes in, and pour Cadbury Mini Eggs into the hole until the top is level. Then place the fourth complete layer of cake on top, with more buttercream in between each layer.
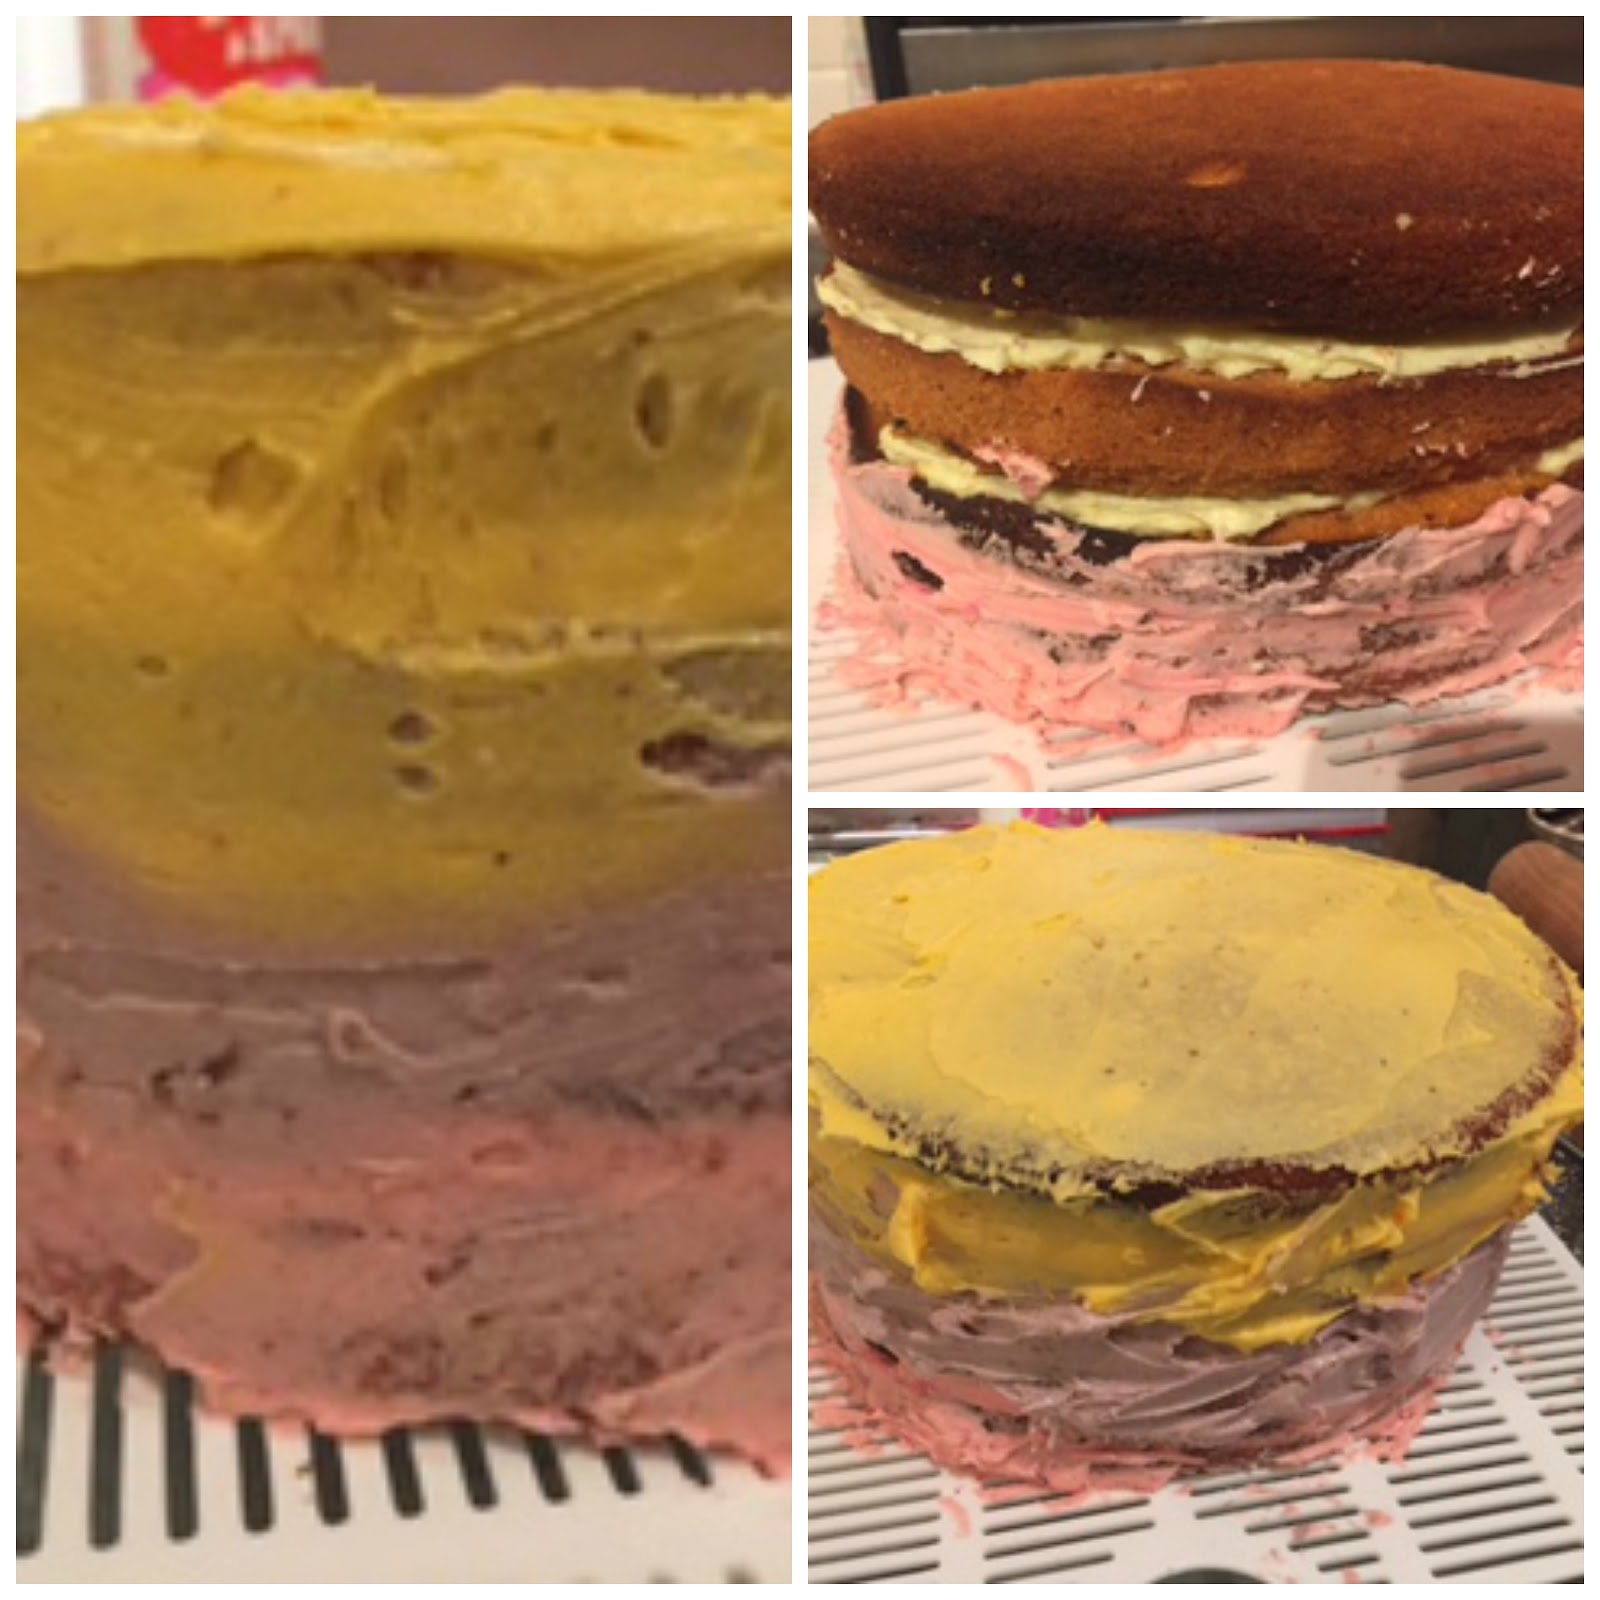
I mixed the same three colours (as one layer of the sponge is its natural colour) with some buttercream and spread it around the side of the cake, one colour at a time. It doesn't matter if the layers of icing are that neat, because you then take a spatula and spread the buttercream so it's even, blending the edges into each other.
Finally I put the cake on a board I had covered with fondant, where I'd stuck a yellow polka-dot ribbon around the edge which I bought from Fantastic Ribbons, which I thought was quite appropriate for Easter. I then spooned my remaining buttercream on top and fixed on a little heap of Mini Eggs.
I didn't know what the inside was going to look like until the judges at the bake off cut it open, so it was quite nerve-racking. It looked great the Mini Eggs spilled out and the other bakers were very impressed. However, the judges said I hadn't used enough buttercream between each layer which made the cake a bit dry, so I didn't win this time. I will have to come up with something better for the bake-off next year….

I'm sharing this with Love Cake, hosted by Ness at JibberJabber UK, as her theme this month is Sport Relief and this cake was made for a Sport Relief bake sale.
I'm also sending it to Simply Eggcellent, hosted by Dom at Belleau Kitchen; the cake uses quite a lot of eggs and of course the Mini Eggs are the star!
Another challenge I can enter this in is Tea Time Treats, hosted by Jane at the Hedgecombers and Karen at Lavender and Lovage, as their theme this month is Easter and Spring.
And finally because it's Easter, I'm sending this to the Food Year Linkup, hosted by Charlotte's Lively Kitchen.
Food Year Linkup March 2016

Saturday, 14 November 2015

Chocolate Salted Caramel Christmas Pudding


Chocolate Salted Caramel Christmas Pudding - scroll down for the full recipe. Read on to find out how I developed the idea and created the melting middle.....

Stir-Up Sunday is the last Sunday before Advent begins and when families traditionally make their Christmas pudding. The idea is that everyone has a go at stirring the mixture and making a wish.
 
For any non-UK readers the idea of Christmas pudding might seem a bit strange. It’s actually a cake of sorts, but steamed rather than baked. It contains dried fruit, spices like cinnamon and ginger, and alcohol – the fruit is often soaked in brandy, and traditionally when the pudding is served, brandy is poured over the top and set alight.
 
I’ve never actually made a Christmas pudding before so when I was asked by Waitrose to come up with a recipe for a Christmas pudding with a twist, I was a little daunted. But I like a challenge, and more importantly the excuse to finally have a go at making a Christmas pudding, even if it wasn’t going to be a traditional one.
 
My recipe turned out really well; whether you make this or follow your great-grandmother’s recipe that has been handed down through the years, don’t forget that November 22 is Stir-Up Sunday! And if you forget, or don’t have time, then get yourself down to Waitrose and buy one of their Christmas puddings!
 
Thinking about what kind of twist I could add prompted several ideas, ranging from Christmas pudding cake pops to adding something like orange and Cointreau to the pudding mixture. When I was younger I didn’t particularly like Christmas pudding with all the fruit and would still prefer a chocolate cake to a fruit cake any day… which gave me an idea and I decided to make a chocolate Christmas pudding. But not just stop there: one of my favourite flavours is salted caramel, and I love melting middle puddings where you cut into it and the runny filling oozes out…. I wondered if it was possible to do that in a Christmas pudding given the extended baking time (up to 5 hours). Well, it turns out that it is! Just about, anyway… but I felt my Christmas pudding with a twist was a resounding success (and the results of the taste test were very positive).
 
I knew the challenge would be what to put in the middle that wouldn’t bake into the cake and would remain liquid – or rather, turn to liquid when heated. As I wanted to use salted caramel, I decided to see if Waitrose sold anything I could use- and they had a packet of Hope & Greenwood Salted Caramel Fudge, which I thought would be perfect.
  
I thought it would probably melt pretty fast though so I put the fudge in the freezer for a few hours, before baking it into the middle of my Christmas pudding. When the pudding was served, I cut into it, and there was actually some liquid caramel in the middle! There were also some chunky pieces of soft fudge which you can see in these photos.


Christmas pudding is traditionally served with brandy butter which I’ve never particularly liked, so instead I served it with Waitrose’s Seriously Caramel dipping sauce. You can of course make your own sauce but this is much easier!
  
Here’s the recipe in full:
 
Chocolate and Salted Caramel Christmas Pudding – an original recipe by Caroline Makes

100g raisins
100g sultanas
75g self raising flour
40g cocoa powder
100g breadcrumbs
100g light brown sugar
100g dates, chopped
100g glace cherries, chopped
100g ground almonds
1 tsp cinnamon
1 tsp ground nutmeg
100g Lindt chocolate with salted caramel, chopped
50g butter, grated
75ml milk - I wanted to use buttermilk but it was out of stock when my online order came
1 egg
75ml brandy- I used Torres 10 from Waitrose
150g Hope and Greenwood salt caramel fudge

to serve: salted caramel sauce
 
First, take the fudge out of the box and put the plastic bag in the freezer for at least 2 hours, or longer.
 
Preheat oven to 170C and grease a 1.5- 2 litre pudding basin that you can put in the oven.
 
Mix the dry ingredients apart from the fudge in a large bowl: the raisins, sultanas, flour, cocoa powder, breadcrumbs, sugar, dates, cherries, ground almonds, cinnamon and nutmeg and chopped chocolate. Stir well to combine.
 
Sprinkle the grated butter over the top and stir well to combine.
 
Beat the egg and add it to the milk and mix together. Add the brandy to the milk and pour into the dry ingredients. Stir until everything is combined and you have a sticky, fruity - and quite lumpy - mixture.
 
Spoon a little of the pudding mixture into your pudding basin so the bottom is covered, then pile the frozen fudge on top. Carefully spoon the rest of the mixture around and on top of the fudge so it is totally covered.
 
If your pudding basin has a lid place this on top; if not - as mine didn't - cover with two layers of clingfilm and then two layers of foil. Boil the kettle.
 
Place the bowl in a roasting tray or similar pan you can put in the oven and pour in boiling water until it comes half way up the side of the pudding basin - or fills your roasting tray. You may need to boil the kettle twice. You may find it easier to part fill the roasting tin, then carry it to the oven, then top up the water while it is already in the oven.
 
Steam in the oven for 4 and a half hours. Check it once or twice during that time to see if the water in the roasting pan needs topping up.
 
When cooked, remove from the oven and allow to cool; be careful when you remove the lid or particularly if you have used clingfilm as steam will escape.
 
When the bowl is cool enough to handle, turn the pudding out on a plate. Serve with caramel sauce and look for the hidden caramel inside!

You can see other ideas for Christmas pudding with a twist here.


Thanks to Waitrose for covering the cost of the ingredients.