Friday, 22 August 2014

Physalis Cake


 Have you ever eaten physalis before? You've probably seen it as a garnish on a dessert - I once had a heated debate with a work colleague who was more than ten years my junior, who had never seen one before and insisted I was making up the name until I googled it on my phone. However, I'd never actually tried the fruit - I'm pretty fussy and mistrustful of food I haven't had before so when I have had it as a garnish on a dessert in a restaurant, I've picked it off!

When I saw a whole bag of physalis in the supermarket for only £1 I decided to try it, but rather than use the fruit as a garnish I decided I wanted it to take centre stage - and that I would incorporate it into a cake.


The fruit resembles mini orange tomatoes and they come encased in tall, papery leaves. It has a sweet yet slightly tart taste; it's also known as a cape gooseberry, but doesn't taste like a gooseberry; in the US it is sold under the name Pichuberry (which sounds like something out of Pokemon to me), due to the origins of one variety in Machu Pichu.

I was going to use a recipe I found online, but hit a few stumbling blocks. As regular readers will know, my boyfriend and I are staying with his mum for a few weeks until the purchase of our new houes goes through (we completed on the sale of my house already due to pressure from the buyer). As I started to get out my baking ingredients, I asked if I could borrow her loaf tin and found she didn't have one. I also looked for brown sugar and could only find golden caster sugar; the recipe I found online used grapes as well as physalis and I don't like grapes. So in the end I pretty much invented my own recipe - but if you want to halve the quantity and use a loaf tin, be my guest.

Physalis Yogurt Cake - an original recipe by Caroline Makes

You need
250g butter
250g golden caster sugar
3 eggs
250g self-raising flour plus a sprinkling for the fruit
3 tbsp low fat Greek-style yogurt or fromage frais
a large handful of physalis, chopped (leaves removed). Reserve a few whole ones (with leaves) for decoration.

For the frosting
100g cream cheese
200g icing sugar

Preheat oven to 175C. Grease and line either a loaf tin or, for my method, a square cake tin.

Cream the butter and sugar and add the eggs. Fold in the flour then mix in the yogurt. Toss the physalis in a little flour (this prevents it from sinking in the cake) and gently stir in to the cake mixture.


Spoon the mixture into the prepared tin and bake in the oven for about 35-40 minutes.

While the cake is cooling, make the frosting - carefully mix the cream cheese with the icing sugar. If you've made the cake in a loaf tin, slice it through the middle; if you've made it in a square tin as I had to, slice the cake in half and place one half on top of the other. This means one side of the cake will be the 'cut' side but I actually think this looks quite nice. Spread 2/3 of the cream cheese frosting inside the cake and the other 1/3 on top and decorate with a few physalis.


I'm sending this to Alphabakes, the blog challenge I co-host with Ros of The More Than Occasional Baker. The letter I have chosen this month is P so physalis is my Alphabakes ingredient.


I'm also sending this to Simple and In Season, hosted by Elizabeth's Kitchen Diary on behalf of Ren Behan.


I'm also sending this to the Vegetable Palette, hosted by Shaheen at Allotment2Kitchen. This challenge chooses a different colour for fruit or vegetables each month and this time it's yellow and orange.


Thursday, 21 August 2014

Restaurant Reviews: Paris

I love Paris in the spring time/

I love Paris in the fall/

I love Paris in the winter when it drizzles/

I love Paris in the summer when it sizzles


I visited Paris in the spring on a work assignment; it was the first time I had been for about ten years. I had an overnight stay so after I finished in the office I went sightseeing, and decided to take a trip on a bateau mouche - a pleasure boat on the Seine. I figured that was the best way to see several things at once and the guided commentary would be interesting; I've visited several museums and the main sites like the Eiffel Tower, Sacre Coeur etc on previous trips, but I couldn't remember whether I had been on a bateau mouche before or not.

Amuse-bouche: duck pate

I alighted after an interesting couple of hours near the Eiffel Tour (albeit on the other side of the river) and wandered along the Avenue Georges V and took a side street or two until I found a restaurant I liked the look of, called Chez Andre. I wondered afterwards if I had subconsciously chosen it because I was in Paris for work and my boss's name is Andrew! The main reason though was that the restaurant had a good menu, wasn't too expensive and looked quite cosy inside.


Cosy wasn't the word for it -  most of the tables were arranged around the edge of the room, with a long table for a larger group in the middle, and the waitress had to pull out the table so I could get in to sit on a banquette, and then push the table back, effectively trapping me. Not ideal if you want to get out to use the bathroom!
Starter: toasted mozarella

Chez Andre describes itself as a traditional French brasserie and was opened in 1936 - "and has kept the same feel it had back then". That's not to say the decor is dated; it is quite traditional though, but one thing that particularly appealed is that I had the impression many of the diners were regulars and locals (they seemed to know other people in the restaurant, and the staff) rather than business travellers or tourists.


I was brought an amuse-bouche of pate on the house and had a starter of mozarella parcels that were delicious but very rich. I then ordered the half roast chicken with French fries; the chicken was moist and fell off the bone and it was a pretty filling meal just right after a long day's working and sightseeing. For dessert I knew right away that I wanted the floating island, having tried to make this dish with limited success in the past. The soft meringue in a shallow bowl of custard is probably something of an aquired taste; very sugary with a caramel sauce on top adding to the sugar rush and nice but not something I would be in a hurry to order again. I have a very sweet tooth but couldn't finish it (though perhaps that was down to the size of my main course as much as the overt sweetness).
Main course: half roast chicken with French fries (or just fries, as they probably call them here!)


The staff in the restaurant were helpful, offering an English menu (though I do speak French, they could clearly tell I was a foreigner) and when I had paid the bill, the waitress pulled out the table again to allow me to leave - I had been a bit worried they might forget and I'd either be trapped in my seat or forced to move it myself and no doubt knock something over!


This restaurant is something of a hidden gem, only a stone's throw from the luxury shops on the Avenue Georges V and the Alma-Marceau tube station (used by a lot of tourists for the bateaux mouches and the Eiffel Tower) but tucked down a side street away from the hustle and bustle.


Dessert: floating island with caramel sauce


Wednesday, 20 August 2014

New Baby Boy Card


I made this card while a friend was pregnant before I knew whether she was expecting a boy or a girl; I made two cards and in the end this one was not needed! The embellishments were really cute and only cost 99p, I think from the Works - they are wooden and come with an adhesive pad already attached. I chose a piece of backing paper with birds that I thought would work well with the baby theme (they are not storks but not a million miles away) and used a silver outline border sticker to frame the backing paper, which I stuck in the middle of the card. I placed one of the baby embellishments in the middle and two more in the bottom corners, and a 'congratulations' silver outline sticker along the top. I've got this one ready now in case anyone else I know has a son!

Tuesday, 19 August 2014

Beef Ragu


Sometimes when it's hot you still want a robust, cooked dinner but you don't want to be sweating over the oven or hob when you get home from work.

I adapted this recipe from Jamie Oliver's website;  he says it will feed a family for three days served over pasta, with mashed potato or crusty bread. I had mine with pasta and put the leftovers in the freezer for another day.

I didn't use all the ingredients from Jamie's recipe - for instance I don't like celery - so for his full recipe check out the link above. Or for my version, which is a bit quicker and I think just as  tasty, read on...

Serves 4
1 tbsp oil
6 rashers bacon, chopped
1 red onion, finely chopped
1 clove garlic, crushed
2 carrots, grated
750g minced beef
1 glass red wine
400g tin tomatoes
1 bay leaf
1 tsp oregano
salt and pepper to taste

Heat the oil in a pan and fry the bacon, onion and garlic.


Then add the grated carrot and minced beef and cook, stirring occasionally, until the mince has browned.

Add the bay leaf, oregano, seasoning, wine and tomatoes and simmer for about 30 mins until most of the liquid has been absorbed. Remove the bay leaf before serving.


This is a great way to sneak in some hidden veg like the grated carrot; you could experiment and see what other veg you can add as well. As well as Jamie's suggestions of pasta, mash or crusty bread I think this would be nice with rice (a bit like a chilli) or in a baked potato. It's really versatile and you can make a huge pot at the weekend and have it for dinner when you get home from work.


Monday, 18 August 2014

Meal Planning Monday - Week 34


Monday
Salmon and hollandaise sauce

Tuesday

Weightwatchers lasagne ready meal

Weds

Out at cinema. Don't think people are meeting to eat beforehand so I might take another weightwatchers ready meal into work to eat before I leave, as I need to watch the calories.

Thursday
out - Posh restaurant to celebrate having bought a house

Friday
Fish cake and veg

Saturday
Lunch quorn sausage sandwich
Dinner Probably takeaway as we are still staying with my boyfriend's mum and that's what she has on a Saturday. Also, the new series of Doctor Who starts tonight so it will be dinner in front of the TV!

Sunday
Lunch probably pasta
Dinner pulled pork burgers and chips or chicken and rosemary tray bake if I remember to add it to the shopping list as I forgot last week!


Sunday, 17 August 2014

Deconstructed Lemon Meringue Pie


 I love lemon meringue pie and thought there must be a way to turn it into a dessert that can be enjoyed in this hot weather. And here it is!

This is a "deconstructed" lemon meringue pie in that it has all the elements of the traditional pudding, but is served cold as a dessert - and doesn't involve any baking at all. It is really easy to make and (unless you want to make your own lemon curd or meringues, which of course you can) literally takes just minutes.

For the base I wanted to use biscuits but something that would give the taste of buttery pastry; I used malted milk biscuits but I think shortbread biscuits would also work well. Simply pulse in a food processor until the biscuits have turned to crumbs (or place in a sealed plastic food bag and beat with a rolling pin until smashed). Place the biscuit crumbs in the bottom of a serving dish or glass.


Add a few spoonfuls of lemon curd; I used some straight from a jar


Next add a layer of whipped cream. It takes only a couple of minutes to beat double cream until it is stiff with an electric mixer.


Dr. Oetker sent me these lemon meringue sprinkles from their new premium collection. As well as using them to decorate cakes you can add them to ice cream or desserts, and I thought they would be just the thing for topping my deconstructed lemon meringue pie.


Finally place a mini meringue on top and then sprinkle with the Dr. Oetker lemon meringue pieces.

Chill in the fridge until ready to serve.


I am sending this to the Biscuit Barrel challenge, hosted by Laura at I'd Much Rather Bake Than.... as she is looking for no bake recipes this month. 


No bake is also the challenge for this month's Treat Petite, hosted by Stuart at Cakeyboi.


Saturday, 16 August 2014

New Baby Girl Card


My friend Jane just had a baby, yay! I made a girl and a boy card in anticipation as I didn't know which she was going to have; it turned out that she had a daughter.

I went with the traditional pink theme and used a pink card blank, and cut a rectangle from a piece of printed backing paper that I thought would make a nice contrast. The swaddled baby, the small heart and the larger heart with the word 'baby' are made of wood, and all came from the same sticker pack. I think cards look nice where they are symmetrical and elements are within the lines but it can also look good to cross lines and borders, like I have done with the 'baby' heart which cuts through the border. The border itself is a silver outline sticker, as is the 'congratulations' word.

Friday, 15 August 2014

Food 'n' Flix: Cloudy With A Chance of Meatballs


This month's Food 'n' Flix food blog challenge is Cloudy With A Chance of Meatballs, chosen by Culinary Adventures with Camilla.

I've seen the film before and thought it was fun; a story that would appeal to both adults and children. The central character, a young man named Flint, lives with his dad and pet monkey, and when his town suffers a shortage of food, he invents a machine that transforms water into food. However, things get out of hand and the machine starts producing food that is bigger and bigger and finally a large tornado of spaghetti and meatballs threatens the town, and the world. Do they save the day? What do you think?

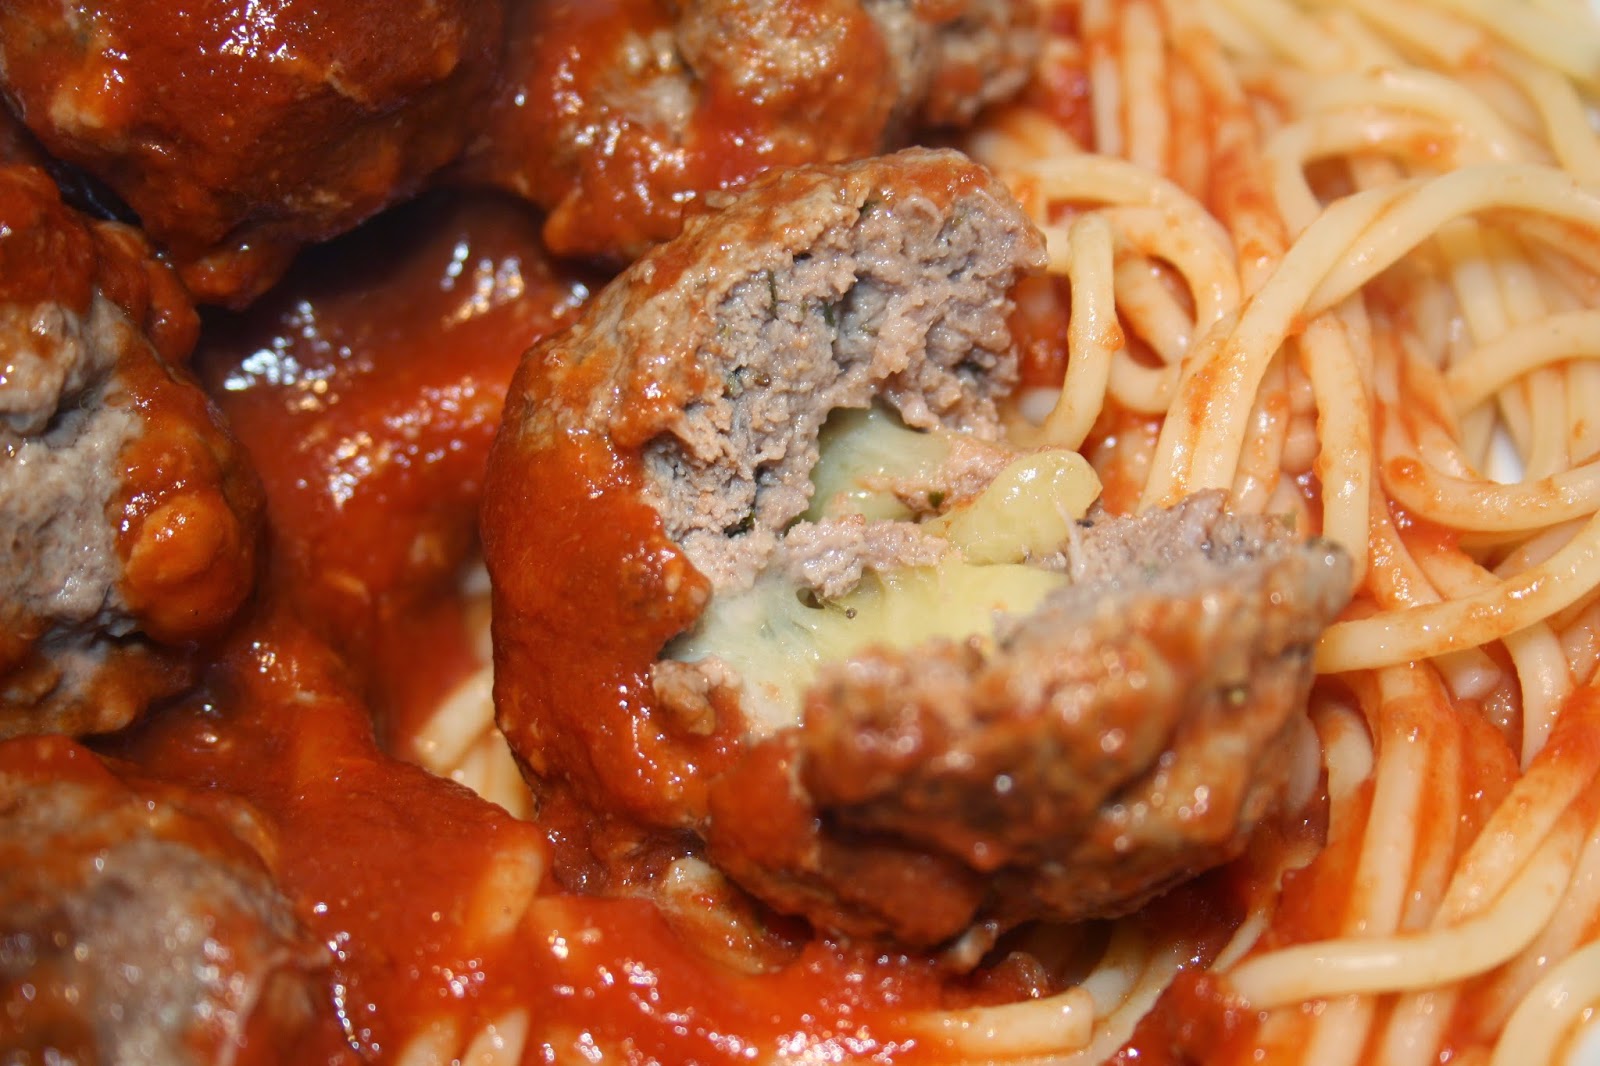
This film is full of food - at one point it rains cheeseburgers - but as the title is so memorable I wanted to make something with meatballs. I've featured meatball recipes on my blog before, like these cheese-stuffed meatballs:

cheese stuffed meatballs


So instead, this is more of a serving suggestion than a recipe. I give you: cloudy with a chance of meatballs!


The clouds are of course mashed potato and the trees are broccoli. This would be a good way to let children have fun with their food and perhaps try something they haven't eaten before!

I'm sending this to Food 'n' Flix,  hosted by Culinary Adventures with Camilla.

Thursday, 14 August 2014

Loom Bands - Jumping on the Bandwagon


If you have children or friends with children aged between about 5 and 10 you will undoubtedly know what loom bands are. My facebook feed is full of people complaining they are finding loom bands all over the house, going up the vacuum cleaner and that their children are obsessed. I walk past Claire's Accessories every day on the way to work and had noticed the brightly coloured packets in the window, and have to admit I was intrigued.
Then I went to stay with a friend who has a five-year-old daughter. Though her daughter wasn't there at the time, I couldn't help but notice her loom band kit and asked if I could have a look. We were going to the open air theatre in Regent's Park that evening which is how I came to be making a loom band at midnight after we got back!
The original product, the Rainbow Loom, was invented by a father who watched his daughters make jewellery from rubber bands. He invented a sort of peg board- the loom- that you wind the bands around and knot them to make bracelets and necklaces. You can make all sorts of things including a dress - and while the basic design is easy to master, there are all sorts of patterns you can weave that look far more complicated.
My friend's daughter had a similar product called the Cra-Z-Loom; the instruction leaflet was really confusing at first until my friend explained what I needed to do, then it was very straightforward, but a bit fiddly. I am impressed at young children who have made the super-complicated patterns!
Here's the pink and blue bracelet that I made - as this is a craft (as well as food) blog I thought I might as well include it! I didn't have time to master anything more than the basic design but if I get a chance I would like to have a go at something more detailed.

Is your house full of loom bands, and what's the most complicated design you (or your children) have made?


Wednesday, 13 August 2014

Restaurant Review: Hot Rocks, Bournemouth

The feeling of sand in your toes, sun warming your skin and the sound of the sea lapping at the shore can't be beat... especially when it's the middle of the week and you feel like you are playing truant from work. I was getting to the end of my tether with the house buying process (five months and counting, thanks to Mr and Mrs C, the most awkward people I've ever had to deal with) and decided I needed to get away from it all. Unfortunately, with the sale of my house imminent I can't go away on holiday, but I realised I had only taken one day off since I started my new job back in February and it was about time for some R&R. Hearing that a heatwave was forecast I decided there was no time like the present and booked the following day off work - and a train ticket to Bournemouth.
My boyfriend couldn't get any time off at such short notice but luckily one of my best friends is a supply teacher and didn't have any work on for the next day, so happily agreed to meet me in Bournemouth. We spent a lovely few hours on the beach, though the promised heatwave never materialised - it was quite cloudy and windy by the sea and I ended up at one point having to put clothes back on! The sun was strong nonetheless, as I discovered when I got home that evening and noticed the sunburn!
We didn't want to stray far from the beach at lunchtime but liked the idea of getting out of the wind for a bit so wakled back up to the promenade. There is a huge Harry Ramsden's on the beachfront but after eating in one in Brighton last year and not being especially impressed, I didn't want to go there.

We debated checking out the restaurant at the end of the pier but instead went to Hot Rocks, a large restaurant only a minute away on the promenade. It has a large outdoor seating area and a long queue inside, but we were told that the queue was people who were sitting outside having to order their food at the bar, whereas if we sat inside, we would have table service. Outside was pretty crowded anyway so we decided to sit inside.

The menu is fairly broad and in keeping with a "surf shack" theme, e.g. luau chicken, malibu ribs, big kahuna burger and shark island, which is a vegetarian patty on foaccia with stir-fried vegetables. Strangely, a lot of the dishes seemed to come with stir-fried vegtables and I'm sure it was even an optional topping in the burger!

I had a lovely non-alcoholic cocktail to drink and the big kahuna burger (without the stir-fried veg) but it was just too big - this is a meal and a half! The burger was quite dense and it came with three onion rings in the burger, and salad and chips on the side. I don't like wasting food (and normally have a big appetite) but left about a quarter of it, it was so filling!


My friend enjoyed the exotically-named luau chicken which was the rather less exotic chicken breast topped with bacon and BBQ sauce (and those stir-fried vegetables again!). I was expecting prices to be steep given the beach front location but thought the £11.95 for my burger and £10.95 for her chicken was pretty normal, until I remembered we weren't in London! I am so used to paying London prices that I forget other parts of the country are usually cheaper (a meal out with the whole of my immediate family in Wiltshire sometimes comes in at less than a meal for my boyfriend and I alone in London!). I was reminded of that when we paid for all day parking in a car park only a few minutes walk from the beach; I was expecting it to cost about £12 but in fact it was £4!

After our afternoon on the beach we walked through Bournemouth's Winter Gardens and I spotted one of my favourite activities as a child - crazy golf. I've played on this course countless times and usually won (whether I was good, or cheated, or my family let me win as I was the youngest, I'm not sure!). It's a traditional course where all the obstacles are made from rocks or wood or involve a bridge or tunnel - none of the clown faces and windmills you sometimes see. Needless to say, I won!


Tuesday, 12 August 2014

Food Photography Lesson - How to improve your food photography


I'm well aware that the photographs I take for this blog aren't great - some are better than others, but that is often more luck than judgment. I've taken a few photography classes before, including portrait photography, so understand a reasonable amount about depth of field, aperture etc. My main problem when I am taking photographs of food is lack of time, and lack of light. I often cook or bake in the evening, when it is dark outside so I only have the lights on the ceiling to illuminate my dish and that just isn't enough (and you often get a lot of shadow). I am always in a hurry as well - I can take my time photographing cake, but when I've made hot food, that we want to eat, there isn't time to faff around trying different angles or rearranging the food. I do my best to make it look nice, but sometimes - despite using a good quality digital SLR - the photos I take amount to little more than a snapshot.
The Guardian newspaper recently ran a masterclass which featured an hour of one of their food journalists talking about writing and an hour of one of their photographers talking about styling and photographing food. It was really useful and I've written a summary here.
The session didn't involve actually using a camera though, and very little practical advice in terms of setting and lighting so I wanted to do a more in-depth course if I could. I had been looking online for a while but there don't seem to be many photography courses that specialise in food. So I was really pleased when my boyfriend found one and booked me onto it for a birthday present!
The Photoion Photography School (so called because it is run by a man named Ion) runs a vast range of courses from night photography, portraits, fashion, studio lighting, photoshop etc, as well as food photography. It's an all day course, from 10.30 to 4pm, near Waterloo station. The course is limited to five people so you get a lot of one-on-one contact, but you can also share ideas among the group.

The morning involved listening to Ion talk and answer our questions, which was very useful and informative and also quite entertaining. I wasn't at all bothered that we didn't even get out our cameras before lunch, as there was so much to take in, and we needed to know the theory before putting it into practice.

After a short break for lunch we spent the afternoon session photographing food. My only disappointment of the day was that for obvious reasons we weren't photographing hot food; I'm sure it's easier to take a photo of a few carefully positioned raw vegetables or cookies than it is to make a cooked dinner look appealing, so I would have liked to know more about that. Even so, the same principles can be applied.

We used an amazing array of equipment - most of it was not really that expensive, for instance a soft box to diffuse the light is about £40, and other things were homemade or very cheap - Ion had a clamp holding a couple of mirrors he'd taken from cheap makeup compacts, and also told us that the piece of card that comes in a packet of smoked salmon - silver on one side and gold on the other- makes a great reflector!

First we photographed a rustic loaf of bread, some tomatoes, olives, garlic and green chilli on a chopping board, experimenting with different settings and lighting. Here you can see some of the set-up.


In this picture, there is additional light from small mirrors directed at the tomatoes to make them look particularly shiny.


 This one is looking directly down on the food


 We then had some fun arranging vegetables on a plate to ressemble a face; the background is a cheap tea towel which I think works really well here.


 Next we tried another rustic collection, on the same tea towel; we matched the colours and textures of the foods and also included a wooden spoon in this shot. The small cookies in the top right again have extra light directed onto them by mirrors.


I asked Ion how to photograph something on a black background and I'm really glad I did, as this was the result: 

In this case it's probably about the camera settings as much as the lighting. I just hope I can remember how to do it again!

This photograph has the same black background but it looks grey due to the lighting. It took a few attempts to get the light right both from above and from the side of the fruit to avoid too many shadows.


 Here's another picture of the set-up for our final shoot,. of a Danish pastry and some strawberries on a chopping board.


We used a gold reflector to give the pastry a warm glow.


I'm not going to share too many tips with you - you'll have to book the course if you want to find out more. But some key ideas I took away were:
  • Natural light is not necessarily better than artificial light, as you can't control it - what you really want is to replicate natural light, but be able to control it.
  • Always diffuse your source of light, eg with a softbox or tracing paper 
  • A photo isn't finished until you make any final adjustments in Photoshop 
  • Zooming in with a longer lens is better for food photography than getting in close with a smaller lens - this really surprised me, but the results speak for themselves.
  • Think about background - food often looks best on wood, and you can buy pieces of vinyl that have a wood effect (much easier to roll up and put in your bag)
  • White plates are actually the worst thing to photograph food on, even though dishes look great when served that way. Use coloured plates instead.
I really enjoyed the class and learnt a lot; I highly recommend the Photoion Photography School!


Monday, 11 August 2014

Meal Planning Monday 2014 - Week 33


Our first of three weeks living with my boyfriend's mum until we wait for our new house to be ready.

Monday
Lunch leftover chicken with cous cous
Dinner salmon with an Oriental glaze

Tuesday
Lunch leftover chicken with cous cous
Dinner takeaway with my boyfriend's family for his dad's birthday


Wednesday
Lunch sandwich/bagel

Dinner steak and chips


Thursday
Lunch sandwich/bagel

Dinner stir fry as it's quick - we are going to see the house we are buying to measure up for sofas straight after work

Friday
Lunch leftover stir fry
Dinner something easy like pasta

Saturday
Lunch tuna melt bagel

Dinner out at cinema

Sunday
Lunch Bachelors pasta and sauce
Dinner  Ocado Easy to Cook rosemary, garlic and lemon chicken traybake