Showing posts with label parcel. Show all posts

Tuesday, 23 November 2021

Make your own motivational quote cards

I'm not sure what these cards are actually called - 'motivational quote cards' sounds a bit worthy and the sort of thing you might find at a company team-building day. What I mean is a postcard with a message that is in some way inspiring, uplifting or encouraging - something that we could all use every now and then!

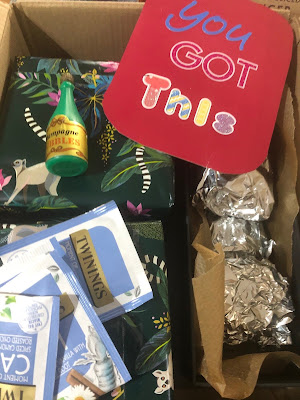
During lockdown I was sending a birthday present to a friend, who I hadn't been able to see for a long time because of Covid. I didn't want to just wrap her present and put it in a jiffy bag so I found a box (from one of my many online purchases) and filled in the gaps around her present with a few other things - some mini bubbles (the kind you blow, not drink), a couple of camomile tea bags and a package of home-made chocolate brownies. I also popped in this card:
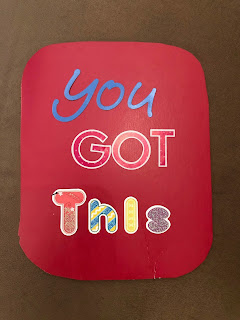

They are really easy to make - you just need a small piece of card, and some letters. You can buy alphabet letter stickers or rubber stamps very cheaply, or if you are good at calligraphy write your own - or type it on the computer and print something out. I used a piece of red card and multi-coloured letters so didn't add any other embellishments, but you can design the card however you want.

Wednesday, 5 May 2021

How to make an Amazon parcel cake


We fall squarely in the camp of ‘how on earth did people manage before Amazon Prime?’. A combination of not wanting to go to shops during lockdown, working full time and not really wanting to spend my free time trawling the high street and a toddler who often needs stuff at short notice means we probably get more Amazon parcels than most. Then there is the fact that my husband actually works for a branch of the company so it’s not far from the truth to say that his bank statement looks quite funny.... money comes in from Amazon... money goes out to Amazon!
 
So when it came to his birthday there was really only one cake I was ever going to make. I'd seen a few pictures on the internet of cakes that look exactly like Amazon parcels, complete with shipping labels - which are all edible. The cake itself looked fairly simple, but the question was, where do you get edible Amazon labels to go on cakes?

 
It turns out that these are actually made of icing sheets, printed using edible ink. You can buy your own icing printer and edible ink and they aren't quite as expensive as I imagined - they seem to start at around £200. Which is a lot, but not prohibitively expensive if you were going to use it a lot. However, I knew I wasn't going to get much use out of one so couldn't justify buying one, and instead found someone selling what I needed on Etsy.

When I bought this in March I could only find one UK seller on Etsy making these, but now there seem to be quite a few, and I've found the same thing on Ebay as well. I paid £9 which was quite a bit for a cake decoration but I was happy to pay it for something this unique!
 
Making the cake itself is relatively easy - you need a square or rectangular cake tin, some roll-out fondant icing, some food colouring and that's about it - as well as your cake and icing ingredients.

My husband loves chocolate cake so I browsed the internet for a recipe that looked nice - I didn't want to use any of the really fudgy chocolate cake recipes I've made before that use a lot of melted chocolate in the cake batter, as our three-year-old daughter would be eating it too. So I wanted it to be delicious but not too rich, and used this recipe from Charlotte's Lively Kitchen, which was really good.
 
If you don't have a rectangular cake tin you can bake two square cakes and join them together, but you might have a bit of a dip in the icing where there is a join.
 
To cover the cake I mixed some fondant icing with a little gel paste in teddy bear brown. You can buy ready made icing by Renshaw in this colour but it's cheaper to add your own colour to white icing, at least if you will be using gel colours regularly (they tend to last a long time). I think the shade looks very similar to Amazon packaging!
 
As well as filling the cake with chocolate buttercream I spread a thin layer over the top and around the sides, then rolled out the fondant to cover it. All I then had to do was add the labels.


They came on an A4 sheet with instructions that said if I had difficulty in peeling the icing off the backing (which I did - it was impossible) to put the sheet in the oven at a particular temperature, and it would harden and come off the backing sheet easily. It worked perfectly, and I only needed to moisten the fondant on the cake a little to get the labels to stick. I was able to get them personalised, with my husband's name and birthday date.
 
My icing isn't perfect - I live in envy of people who can make perfectly sharp corners - but from a distance this looked very realistic, and my husband thought it was brilliant as he hadn't seen these cakes before!


Saturday, 24 March 2012

Cake decorating class #2- parcel cake

My second cake decorating class - and the first time we actually made anything - resulted in this parcel cake, above. I think it turned out really well and it's definitely something I could make for someone's birthday!

We were told to bring a square cake to the class with us, so I used a Jamie Oliver recipe which I found here. Unfortunately the cake was quite flat - probably only 1.5 inches or so thick - so I ended up making two, and sandwiching them together with buttercream.


At the beginning of the class, I was told to spread a thin layer of buttercream around the sides of the cake. It hadn't occured to me to turn the cake upside down so the top was perfectly flat until Lorna told me to!

Some people in the class had already covered their cake with buttercream and fondant but I didn't see the point of doing that in advance when I wasn't entirely confident about doing it and would rather Lorna showed me how - I'd only ever done it once before, whereas I got the impression some of the other people had done it countless times.

I used Dr Oetker's roll-out icing in chocolate flavour as I thought it would go nicely with the chocolate cake.


Next we made the ribbon to go on the top. Below is Lorna's ribbon cutter which I borrowed, on a piece of green rolled-out fondant. You could just use a knife or a pizza cutter would work quite well.

A piece of 'ribbon'

Cut out two and lay them across the cake.

These are bow cutters - again I borrowed Lorna's. You could just cut the shapes out with a knife but this way made sure they were the same size and shape.


Take the bottom two pieces of the bow - which are angled at the end - and fold over the tops to make them look like a fan. Stick those ends onto the centre of the ribbon. Then fold over the top pieces so you have a loop. Stick the loop on the cake, standing up, to make the top part of the bow. Finally fold a small piece of fondant over the knot in the middle of the bow.


I think I will also enter this in We Should Cocoa as the challenge from Chele  this month is "something green".