
Have you come across box cards before? They fold flat to go into an envelope, but when they are opened, pop out into a three-dimensional box that stands up, and often has other elements 'exploding' out. They take a little while to make but are really worth it as they are impressive and really unusual. I made this one for my husband's 40th birthday last year and he was really pleased with itI'd heard of these cards but didn't know how to make them so looked for a video on You Tube.
It's a bit too difficult to describe each step and easier to direct you towards a video like
this one or
this one - I can't actually remember which tutorial I used now!
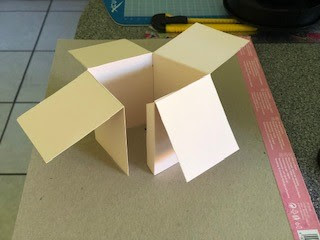
You need a fairly large piece of card to start with, roughly A4, and score lines at certain widths apart so you can later fold along them.
Make cuts part way up where you have scored
You'll find the card then folds into a box shape.
To decorate, I cut squares of patterned paper the same size as the sides of the box and used a different paper on each side (but in the same colour scheme).
Stick two strips of acetate inside, folding them at the ends so you can glue to the sides of the box; these create cross strips that you will then stick things to.
To make an element stand up out of the card, stick it onto another strip of acetate as shown, then stick this acetate strip vertically to the horizontal ones running across the box. Glue dots are good to use for this.
This is the effect you are going for! You can add as many of these as you like.
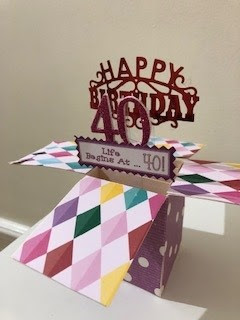
You can see that here I've got three elements sticking up inside the box; two are glued onto acetate strips running horizontally through the box and one is stuck to the front and the back of the box itself. Make sure the elements aren't aligned with each other either in position or height, otherwise you won't be able to see them all when you look at the card from the front.
Here's a better view of the box so you can see the elements sticking out - a 'happy birthday' die cut, a 40 I cut from silver card, and a 'with love' heart. I also used a 40th birthday message topper on the front of the card.
And here the card is from the front; it's better in real life as you can take in all the elements at once. I think my husband liked it and seemed pleased with the amount of effort I'd put in to make him something special!
I'm sharing this with
Cardz 4 Guyz as the theme is 'January blues' and the
Make My Monday challenge where the theme is 'fancy folds'.


